Welcome back to another Thinking Outside the Box Design Team Blog Hop! It's great to have you with us! This month we are doing boxes that have lids with windows. . .
This is my project:
The box is very simplistic and easy to create - the "wow" factor with my lid with a window is that I made it into a shaker lid.
Here are the steps:
1. The template is quite straight forward and the box can be made using one and half pieces of A4 card stock.
The dimensions of the box are 6cm x 6cm (2
3/8" x 2
3/8") and the lid is 6.2cm (2
1/2") square with a 2cm (
3/4") lip with the folds and seams the lid ends up being a snug fit.
2. This is what the base looks like once its been measured, scored and cut out. I used thick Whisper White card stock:
3. I stamped the flower from the Lots of Happy Card Kit in Calypso Coral ink. I stamped off each stamp before stamping the images. This is what the base looks like once it's stamped and before its constructed. Make sure you burnish all of the score lines to make assembly easy.
4. The lid looks like this once it has been measured up, scored and cut out. I do all cutting and scoring with the Paper Trimmer. I only trim the edges of the flaps with my scissors.
5. I wanted to keep the lid relatively plain because of the shaker feature. I selected the best fitting scalloped edged square framelit from the Layering Square framelits. It fits perfectly with a 2mm (
1/8") border.
The void is perfect. Make sure you burnish all score lines before running the card and framelit through the Big Shot.
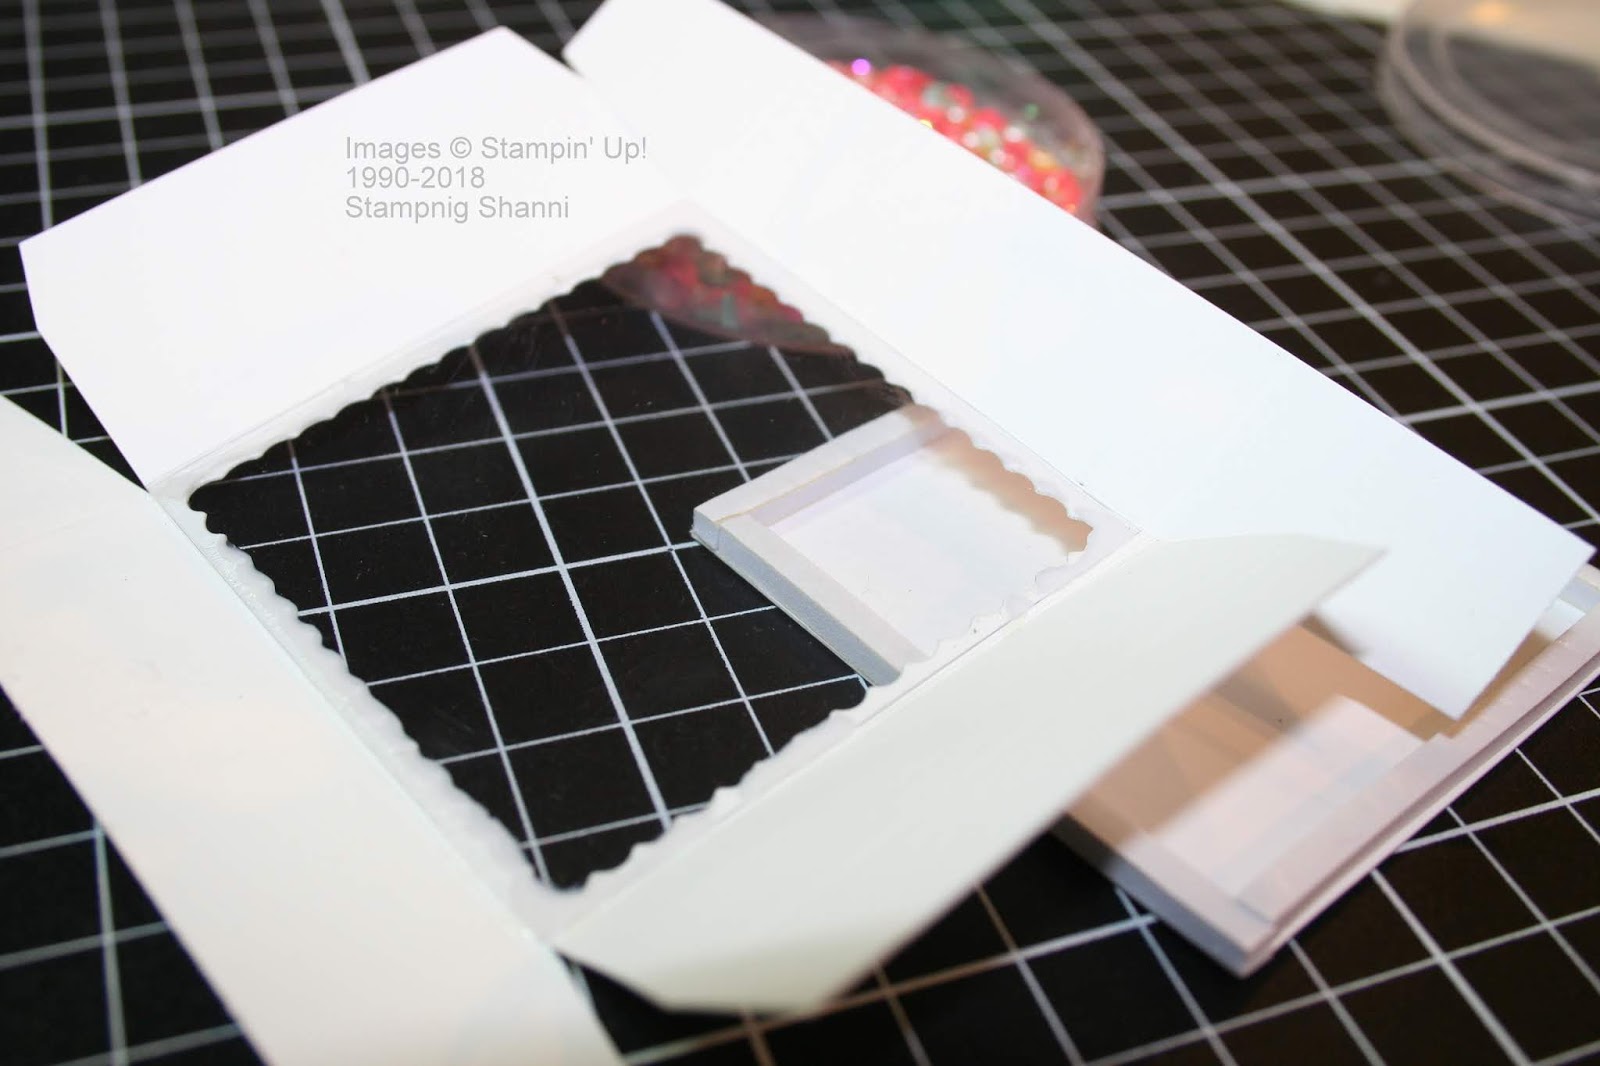
6. You can just see that I have cut a square of Window Sheet to the lid measurement of 6.2cm (2
1/2") square. I also cut another square of Whisper White card stock to the same size. I lined the perimeter of the card stock with foam adhesive strips.
I glued the Window Sheet on the inside of the lid prior to construction using Tombow Glue. I constructed the shaker part before assembling the lid.
This is what the inside of the lid looks like once the shaker feature has been created.
And this is the reverse side - the outside and top of the shaker before the assembly and before added the stamped features.
7. I added a piece of ribbon from the card kit to tie in the green in the coloured image on the top of the lid and the beads in the shaker feature.
The sentiment is from the stamp set that comes with the Lots of Happy Card Kit. I used the smallest plain square from the Layering Squares Framelits to cut a small square of Whisper White card. I stamped the sentiment after cutting to ensure that I had the right placement.
I daubered the edges with Calypso Coral ink, stamped the floral stamp from the stamp set from the kit in Smoky Slate (stamped off a little) and then placed the square on the right angle on the punched Calypso Coral card, punched with the Pretty Label punch. These are adhered directly onto the box as you will see that the lip of the punch/sentiment fit just under the lid. The pearls are to tie in with the pearls on the stamped and coloured images on the lid and the pearls in the shaker feature.
I thought that a different angle would give you a perspective on how pretty this little box is!
8. I stamped the floral image from the same stamp set that comes in the Lots of Happy Card Kit in Black Tuxedo Memento Ink on Whisper White card stock and coloured the images using the following Stampin' Blends:
Light Calypso Coral
Dark Pink Pirouette
Light Pumpkin Pie
Light Old Olive
Light Pool Party
I fussy cut the images once they were coloured and adhered them to the Window Sheet with glue dots. You will see that I added some small pearl jewels to the stamped and coloured images.
I love how the Iridescent Sequin Assortment embellishments glisten and sparkle and add a real wow feature to the lid.
You can see how the colours all work in perfectly together. It was a fun project to make and so simple. The hardest part is keeping all the sequins in the lid until you have the shaker feature assembled lol!
I hope you like the project and are inspired to check out the rest of the blog. There are so many different takes on this project and I am sure that something will catch you eye!
Next up is the incredibly talented
Tanja Kolar from Germany my good friend and stamping sister, she will blow you away with her amazing project.
Have fun and see you next time.
Big Hugs
Shanni xx
This month's Blog Hop Order


Love your take on the box. Pretty decorations too with clever shaker. Zoe x
ReplyDeleteThis is so cute!! I must try this out.
ReplyDeleteSuch a great idea to make a window which is actually not a window but a shaker! It makes the box extra special! Love it!
ReplyDeleteGorgeous box.
ReplyDeleteI must truly laugh, because we two had the same thought... like we here say ( friendly): Two stupids, one thought **giggle**
Thank´s for being part of our amazing design team.
Hugs Tanja