

Check out our design team members who represent every country where Stampin' Up! is sold globally. These team members will bring you an innovative and exciting project each month so keep an eye out for us on Pinterest and stop by every month on the third Sunday. . .


1. You will need to use 12" x 12" card stock for the sized box that I have made (Cadbury's were not very considerate of the crafting world when they released Caramello Koalas!)


3. Cut on the score lines as per the plan - the orange dotted lines:

Using the 21/4" circle from Layering Circles Framelits cut a semi circle from the narrow panel as marked with the orange dotted line.
4. Choose your stamps and decorate the panel.

I used the pine leaves from Christmas Happiness stamped in Old Olive and the reindeer from Seasonal Chums in Memento Black. I also stamped an extra reindeer on a piece of whisper white card stock to fussy cut. I proceeded to colour the reindeer with our Stampin' Blends - used Light and Dark Crumb Cake, with the Colour Remover and Light and Dark Cherry Cobbler
5. The lid is as per the pictorial instruction above. I cut a piece of Old Olive 43/8" x 51/2". Score the card 1" on each side and snip the scored lines in 1" and trim the card on an angle.

This is how it will sit:

6. This is the base requirement for the dispenser part of the box:

I chose to make the base in Whisper White card stock, basically the base ends up the same size as the box perimeter so 21/4" x 31/2". Cut along the orange dotted lines and score where the dark blue lines are. Stick the base to the box with a heavy duty tape like Tear & Tape Adhesive. The triangles on each side of the scored area slip back into the semi-circle void which you slit on each side up to about 11/2" mark.
7. This is what it should ultimately look like:

8. Decorate to your taste.


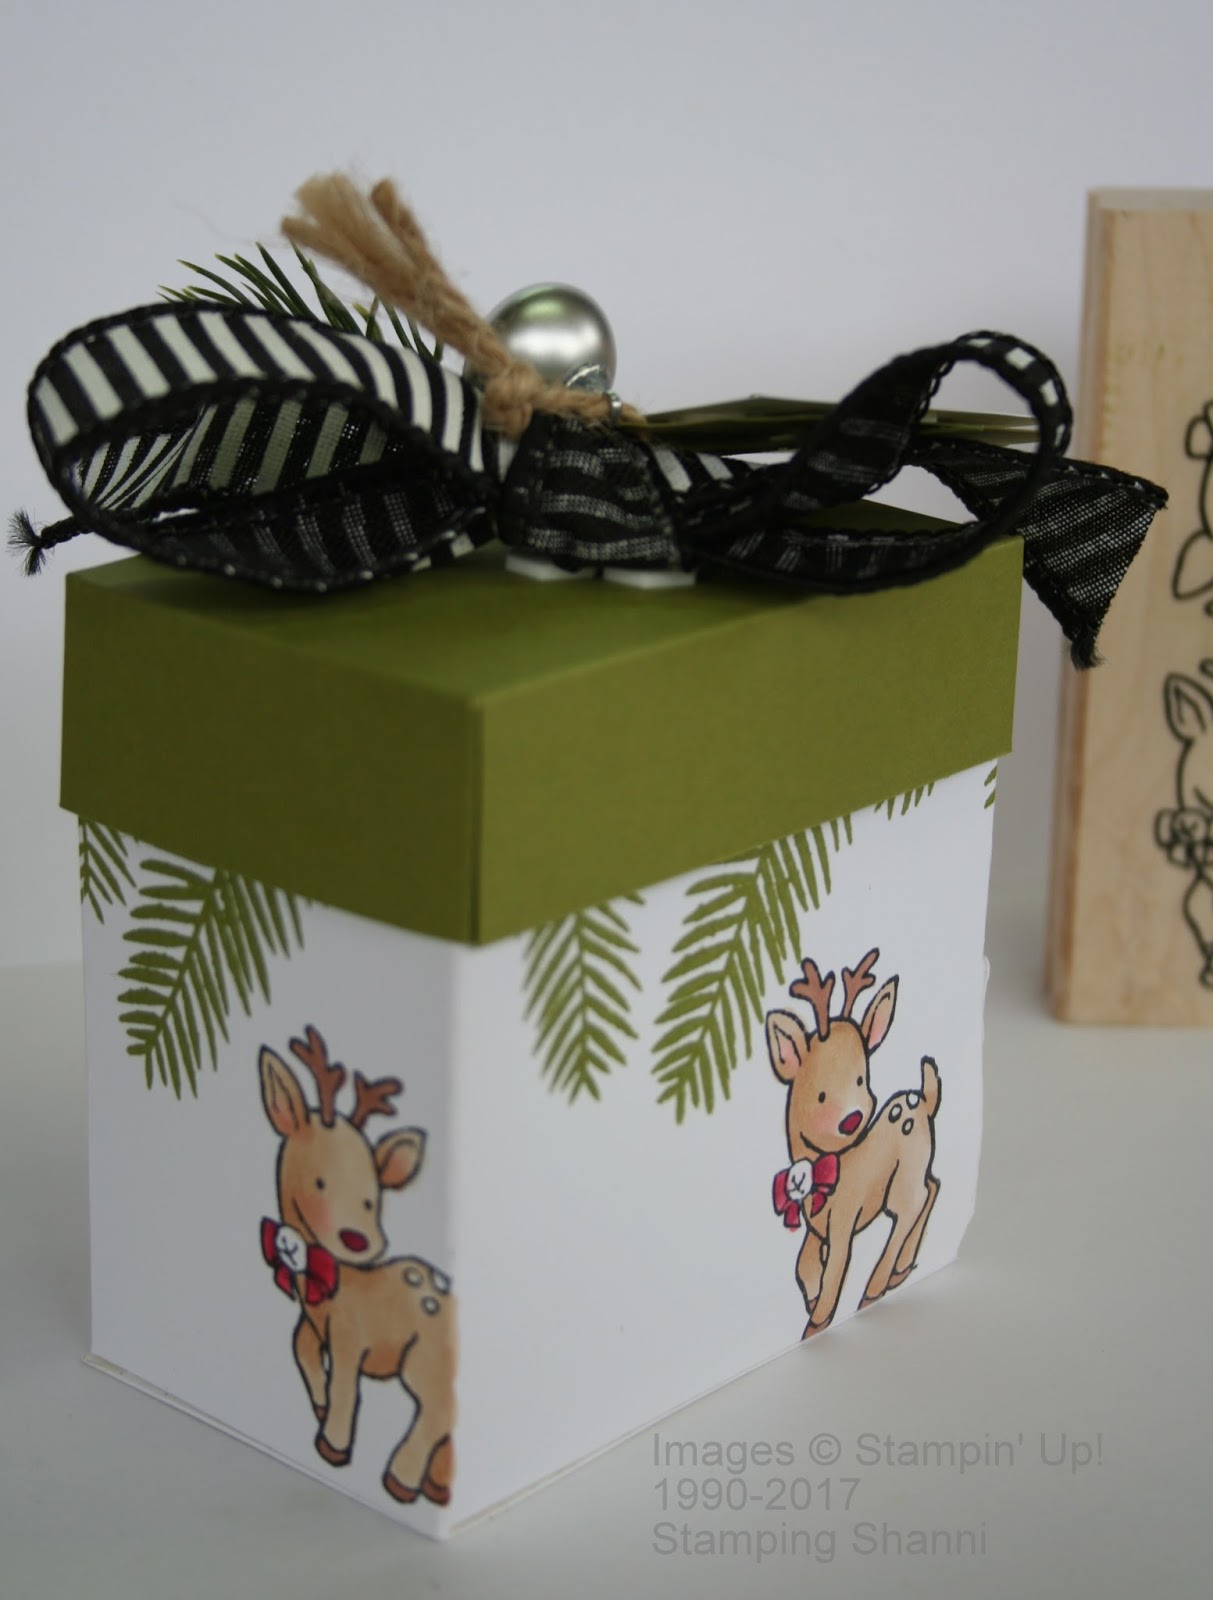
I also used Striped Ribbon, Merry Little Labels, Everyday Label Punch, Mini Ornaments, Green Sprigs and Black Rhinestone Jewels to decorate the top of the box.
Enjoy! And seriously consider making this box. It's really simple. Don't leave us yet though. . . we have so much more planned. Check out Tanja's incredible dispenser!


Hugs
Shanni xx
Order of Blog Hop
Shannean Moncrieff (Australia)
Tanja Kolar (Germany)
Yoshiko Endo (Japan)
Zoe Tant (United Kingdom)
Annette Elias (Netherlands)
Dena Rekow (United States)
Sharlene Meyer (New Zealand)
Beate Wacker (Austria)
Aude Barbara (France)
Barbara Stewart (Canada)
My friend.. stunning as always.Your work is so cute. Think, kids will love it.
ReplyDeleteThank you, that you´re part of our group.
Enjoy the rest of your sunday.
Hugs Tanja
Oh this is super cute Shannean! Love the shape and that little reindeer is just adorable!
ReplyDeleteHow cute are those reindeer and I love them trotting around your box. Another great design. Zoe x
ReplyDeleteOhhh what u Cutie! It is great to see another bigger box in this bloghop! I will definitely make one of these following your tutorial! Such a great "door"! I love the decoration you made too! And your koalas make me a bit hungry ;o) Your box will be lovely gift!
ReplyDeleteThis is so dang sweet, Shannean!! I just love how cute that little reindeer is!! Love your design! :) Thanks so much for sharing!!
ReplyDeleteGreat project! Love the reindeer
ReplyDeleteReindeers in Australia - I love this! The mechanism to open is genious! I think I have to change the projects for my kiddy-workshop next week!
ReplyDeleteGreetings from Austria,
Beate
Hahaha, who wouldn't want to have one of those!! I love it!! It's cute too.
ReplyDelete