Wednesday, February 27, 2013

Bless You Tissue Paper!

I am loving so many things from the Seasonal Making a Difference Catalogue and seem to be discovering new things every time I page through it. . . one of the items that I wanted to "play" with is the Creped Filter Paper.

This Creped Filter Paper looks as fine as tissue paper but is as strong as card stock and can be used for all the purposes that card stock can be.  Stay tuned over the coming weeks for some projects incorporating this versatile new paper.
Not content to leave the Creped Filter Paper white I wanted to add some colour so I spritzed a page with water then added a few drops of reinker in Pool Party, Baja Breeze and Not Quite Navy. I then re-spritzed in order that the colours leached into each other. It was amazing how quickly the filter paper dried. Do not panic if the colours seem very dark ~ they will dry off a lot lighter.

I then stamped with Versamark using the stem stamp from Field Flowers and the two flower stamps from Fabulous Florets and heat embossed with white embossing powder.  I was stunned at how quickly and evenly the image glossed up. I then mounted the stamped image on Whisper White cardstock and again on Not Quite Navy card stock
 

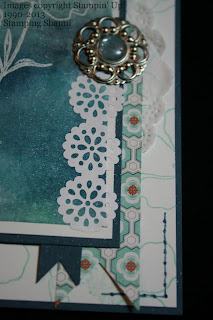
Stampin' Up! has introduced this beautiful Delicate Details Lace Tape which is a bit like washi tape but stronger. I am loving it as well - this is the smaller of the two sizes of tape that we have. I have also snuck in a piece of Sycamore Street Designer Series Paper as the pennant at the rear and a Designer Builder Brad which I made with some of the Creped Filter Paper ~ I wanted it to look a bit like a moonstone. I also snuck in a piece of doilie to add to the feeling of luxury.
The Sycamore Street Designer Series Paper has a great combo of colours and designs in the selection ~ Island Indigo, Pool Party, Rich Razzleberry and Tangerine Tango just to name a few. This paper is an exclusive gift when you spend $100 or more on Stampin' Up! products until 22 March.

If you would like to book a party or host a class let me know as soon as possible to take advantage of all the FREE stuff that you can earn during Sale-a-Bration.  Of course as always this offer is limited to Australian residents and obviously it is essential that you live in the Cairns region.

So the next little creation I came up with using the same style of image is this one:

I simply cut the stamped image out using the Ovals Collection Framelit Dies.  I also cut a "frame" using the same dies (two sizes apart) in Not Quite Navy card stock and then ran it through the Lacy Brocade Embossing Folder and Big Shot.

The base card looked a bit plain so I rounded the corners to fit the "oval" theme and then because I wanted to jazz it up a little I ran it through the Big Shot with the Holiday Frame Textured Embossing Folder.
I then sprayed the whole project with Stamping Perfume - Frost White Shimmer Paint diluted with rubbing alcohol! Perfect.

I am always surprised at how the same stamped image can be treated differently and change the entire outcome of what the project looks like!

Until next time
Shanni xx

Monday, February 25, 2013

Another Artisan Creation

I am in love! I know you are wondering what I am in love with ~  the Artisan Embellishment Kit and the Primrose Petals Core'dination card stock - it's hard to pick what I like most!

Here is my latest creation with both of these products and a few others
I love the effect of the Honeycomb textured impressions embossing folder on Core'dinations card stock. I have paired it here with the Tea for Two DSP and Basic Gray/Basic Black Two Tone Ribbon.
The image was stamped in Primrose Petals and Old Olive ink using the flower from the Oh, Hello stamp set from the Making a Difference Mini catalogue. I then cut the image out with the Ovals Framelit Dies. I also stamped the chevron arrows in Primrose Petals and Basic Gray on First Edition Specialty DSP and fussy cut them out. I love the paisley images and how they all complement the DSP and colour scheme.

Next I cut two flowers from the Vanilla Flower Trim that is just divine and so versatile to use. I added a tiny rose from the Artisan Embellishment Kit to balance the arrangement. Those little roses are to die for they are soooooo quaint!
The Designer Builder Brad adds a little bit of bling to the project. I punched a 1/2' circle of Tea for Two DSP and tied a matching piece of Bakers Twine (in Lucky Limeade) on the edge to marry in the colour scheme.

The sentiment is from the Made for You stamp set and I thought that the pennant shape would fit the card well.

I should mention that if you would like to purchase anything from the Making a Difference Mini you can email or phone me with orders. Obviously this offer is only open to Australian residents.  We have less than a month left of the Sale-a-Bration promotion and there are so many goodies to choose from this year.  I would love to help you select an item that suits your crafting needs.

Ciao for now
Shanni xx

Sunday, February 24, 2013

Liebster Award

Wow! - one of my blogging buddies whom I started following after visiting regularly on Make it Monday has nominated me for the Liebster Award. . .

A massive thanks to Shari from Shari's Cards and PaperCrafts for this nomination. It really warmed the cockles of my heart. What a lovely lady!

So here is the badge:
And here is a little about what the award is all about:

This award was designed to be a blog award in the "pay it forward" fashion. Once you've been nominated, you award it to five blogs that you like that have fewer than 200 followers, to encourage new visitors to visit these blogs.


The rules for accepting this award are:

You need to thank the person who gave you the award and link back to their blog. Post the award onto your blog. Give the award to five bloggers who you appreciate that have fewer than 200 followers. Leave a comment on their blog letting them know that you have given them this awesome award!

Next you need to PAY IT FORWARD

So here are five awesome blogs that I think you should check out:

1. Pia's Paper for her great colour combinations and inspiration;

2. Keti's Projects for her amazing creations and stamina;

3. Loz at Laurel's Crafty Retreat for her awesome colouring, cards and projects;

4. Susan Smit at Sussi Poppins because of her amazing scrap booking and hand made embellishments;

5. Carole at Carole's Own for her delightful colouring and card creations;

I hope you'll visit each of these blogs and check out all the wonderful projects they have posted. Thanks again Shari for the nomination

I hope you will all pay it forward
Shanni xx

Monday, February 18, 2013

Lovin' the Artisan Embelly Kit

OMG! I could not believe the gorgeous items in the Making A Difference Seasonal Mini, especially the Artisan Embellisment Kit which is a collection of charming, creative impulses. . . read luxurious ribbons, lace, etched and molded buttons, flowers and much, much more!
I ordered them straight away and literally counted the days until my order arrived (my parcel was stuck in floods in the south though so I needed to be extra patient). I have unravelled every piece of lace, positioned and repositioned buttons, flowers and doilies. It seems strange not making my own roses but these little beauties are just so adorable that I want to put them on everything. . .

Firstly though I wanted to make something elegant. I was inspired by a card made by the Queen of You Tube Stampin' Up! card making - Tami White, she used the elegant pearl lace on Crumb Cake cardstock. . . this is a pretty obvious leap as the lace is presented on the cutest card which has hearts punched from the top!
So here is my little card, which I am thinking would be nice for a wedding or anniversary. Very Vanilla and Crumb Cake base card stock. I embossed and fussy cut the Oval Designer Frame with the embossing folder and Big Shot in both Very Vanilla and Crumb Cake.

I stamped the the largest flourish from Flowering Flourishes on the Very Vanilla Oval in Crumb Cake ink ~ I wanted a whimsical image to marry in with the delicacy of the lace.  The Vanilla Seam Binding Ribbon seemed the perfect silky contrast to the luxury of the pearl toned lace.
A little piece of Linen Thread and an Antique Brad that is distressed with a touch of white set the double bow off nicely and married in with the vintage theme of the card. I cut a small banner from the Champagne Glimmer Paper and the sentiment "Happiness" comes from the Loving Thoughts stamp set.

Although it has retired I had to add a piece of Crumb Cake Scalloped Tulle Ribbon (which I had decorated with Champagne Glass Glitter along the edge) for a contrast and to add the sense of richness.
Finally to the Oval framed feature I added one of the molded rose buttons from the Artisan Embellishment Kit and a single rose from the Vanilla Flower Trim (it's so easy to cut these off individually or in groups).  I sprayed the entire card with Stamping Perfume - Champagne Shimmer Paint diluted with rubbing alcohol.

I'm pretty happy with the outcome and hope that you are inspired to give the embellishment kit a try.

Cheers
Shanni x

Friday, February 15, 2013

Ex Libris Birthday Card

Sometimes I just like to play with a set to see if it can do all that I want it to do. That was exactly what happened when I was making this card and fortunately for me it fitted my goals for a birthday card. . .
Base card is Soft Suede mounted with Always Artichoke and then Cherry Cobbler and then the actual card base which is Very Vanilla. The Ex Libris is stamped twice, first on the card base and then again on Very Vanilla in Soft Suede ink. I fussy cut the outer part of the stamped frame from the second stamped image and mounted it on the base image - to give the impression that the whole background was framed. Of course I couldn't resist distressing the edges a little and daubing in Soft Suede.

The flowers are stamped in Cherry Cobbler and Early Espresso using the Stippled Blossom set. This is a terrific two step stampin' set and very easy to use with great outcomes every time. I stamped two of the larger flowers and five of the smaller one then fussy cut them out.  The leaves from the same set are stamped in Always Artichoke and Early Espresso. I highlighted the centres of the flowers with Silver Dazzling Detail.
I then layered the flowers and poked the leaves in where they looked the most natural and they also served as a method of separating the flower images so that it all appears to be a "natural abandon" of flowers.
I couldn't resist adding some texture - Vanilla and Cherry Cobbler Seam Binding Ribbon tied with some Linen thread.  I love that you can scrunch, pull and fray the seam binding for different effects.

The greeting is from Well Scripted and I thought that it married with the filigree and pattern of the Ex Libris background.
The inside of the card has been decorated with one of the large images from the Stippled Blossom set to marry in the whole theme.

Happy Birthday Karen!

Cheers
Shanni xx


Wednesday, February 13, 2013

More Amore Designer Fabric - Valentines

I don't generally celebrate Valentines' Day and my husband certainly doesn't celebrate it lol! But I thought I should make a card on the off chance that he changed his mind and sprung a dozen long stem red roses on me or a box of Guylian chocolates!

I adore the More Amore Designer Fabric in the Making a Difference Seasonal Mini and wanted to work it into my card project. . .
The base card is Real Red and I have mounted a piece of Basic Black card stock on it.  The designer fabric is adhered using Multipurpose Adhesive sheets.  I wanted to incorporate a lot of texture and thought that the best way to do this would be to use some Real Red Core'dination card stock, which I embossed with the Lacy Brocade embossing folder and the Big Shot.  I then gently sanded the embossed grain of the card stock to give it a soft suede effect.

I also used the Fashionable Hearts Embosslit with some Core'dinations card stock and sanded them off gently (the one with the polka dots and the hounds tooth worked a treat). And then I punched a few more hearts in matching card stocks to balance the whole thing.
I have punched some plain Basic Black hearts out using the retired Trio of Hearts punch.  I couldn't resist adding some extra bling and texture by punching a few hearts out of the Real Red Glimmer Paper.  The sentiment comes from the You're a Gem set.
Finally I added a few hearts to the inside because in reality it's what's on the inside that counts. . .

Happy Valentines Peeps!
Shanni xx

Sunday, February 10, 2013

21st Birthday with Papaya Collage

I find milestone birthday cards quite difficult because there is some chance that the card may be kept by the recipient and I am nervous that they will look at my card in years to come and . . . think "why?". So I took a bit of time making one for a friend of mine who was turning 21. This is the end product:
I love the Papaya Collage stamp set and have to admit it was one of the first sets I purchased when the Stampin' Up! cattie came out last year.  I use it for all sorts of projects. So here you see the filigree frame and the butterflies.  I have also used the music and grapes images from Nature's Pace. And the sentiment is from Memorable Moments.
You can see that I have stamped the butterflies in Craft Basic Black - which gives the best images - sharp and clean every time. I stamped six of them and coloured them with Cherry Cobbler ink and an Aqua Painter.  I then fussy cut them and stretched them with the ball of a stylus so that they have a dimensionalised appearance.  I then stuck them one on top of each other on the card using dimensionals to give them even more height.
The base of the card is Very Vanilla.  I have mounted First Edition Specialty Designer Paper on Cherry Cobbler and then on Early Espresso and mounted those three layers on to the Vanilla.  I placed a Cherry Cobbler block behind the Vanilla as well to "frame" the image of the stamp.

The frame is stamped in Craft Basic Black and I stamped the music notes in the same ink.  The fern leaves from Papaya Collage and the grapes and leaves from Natures Pace are done in stamped off Garden Green ` where you ink up the stamp, stamp it on scratch paper and then stamp it onto your project.

Texture and interest is added with the Cherry Cobbler Seam Binding Ribbon, Linen Thread and Antique Brad - gotta love those little beauties!

The rose is of course made in my standard way - see my earlier post on Rose Making for instructions. Basically it is only Cherry Cobbler card stock and Fancy Flower Punch outs. The leaves were cut using the Little Leaves Sizzlet die and Big Shot.

Voila!
Shanni xx