
So I had been asked to do flowers and flourishes as my presentation during my allotted time slot. We were to make a variety of projects to appeal to the attendees including cards, scrapping pages and off the page projects if we felt inclined. . .
Here is one of my projects:

The base of the project is grunge board (which I collect from packaging such as the Glimmer Card stock and Simply Scrappin' Kits). I cut the card and the First Edition Specialty DSP with the Originals Two Tags die. Distressed the edges and daubed them all with soft suede and crumb cake.


I selected the Regals Family of coloured card stock and ink to use with the projects so the primary colours are Cherry Cobbler, Riding Hood Red, More Mustard and Not Quite Navy. I have also added the usual neutral shades of Early Espresso, Soft Suede and Crumb Cake where needed.

The flower is made using the Fancy Flower Punch. The leaves are stamped using French Foliage stamps and the rock and roll technique in More Mustard and Riding Hood Red and Soft Suede and Riding Hood Red. I fussy cut them out and distressed them a little. The contrasting little leaves are from the Bird Builder Punch in the Champagne Glimmer Paper. The corrugated card in the background is from the delivery carton and the scallop edge has been done with the Large Scallop Edgelit. The letters are all done using the Bigz Typeset Alphabet in Riding Hood Red and sealed with Crystal Effects for impact. Project sprayed with Stamping perfume (champagne shimmer paint diluted with rubbing alcohol).

I stamped directly onto the DSP background in the rock and roll technique on this one. The rose is made using the Fancy Flower Punch in More Mustard and the contrasting leaves are done in the same way as above. I also cut out an acetate butterfly using the Bigz Beautiful Butterfly die. I then ran it through the Elegant Lines Embossing Folder for texture and the jeweled body is made from Rhinestones which I coloured with a red permanent marker. The "N" tag has Cherry Cobbler Scallop Edged Tulle and Crumb Cake Seam Binding ribbon which I have finished with a Faceted Vintage button on top of a 1/2" circle punch of Champagne Glimmer Paper and linen thread/ The daisies along the bottom are from the Paper Daisies packs daubed with More Mustard and finished with Pearls.
The Butterfly images and frame come from Papaya Collage. Butterflies are stamped in Craft Basic Black and coloured using the Regal Water Colour Crayons. The larger butterflies were created using Acetate Window Sheets and Very Vanilla card stock (stamped with the floral image from Elements of Style) - both run through the Big Shot using the Beautiful Butterflies Bigz die. The acetate was then embossed using the Elegant Lines Embossing Folder and the edges dipped in Champagne Glass Glitter (and tom bow for adhesive). Extra large and normal sized pearls for interest. Gold leaves Bird Builder Punch and Champagne Glimmer Paper.

Background stamped with the Elements of Style flowers. Glitter tulle made with Crumb Cake Scallop Edged Tulle, tom bow and Champagne Glass Glitter. Buttons from the Regals collection and linen thread. "A" Tag is dressed with Cherry Cobbler Seam Binding ribbon, Early Espresso Scallop Edged Tulle and Linen Thread along with a beautiful Antique Brad. There is an acetate butterfly made by the same method mentioned above on the edge of the "a" as well.

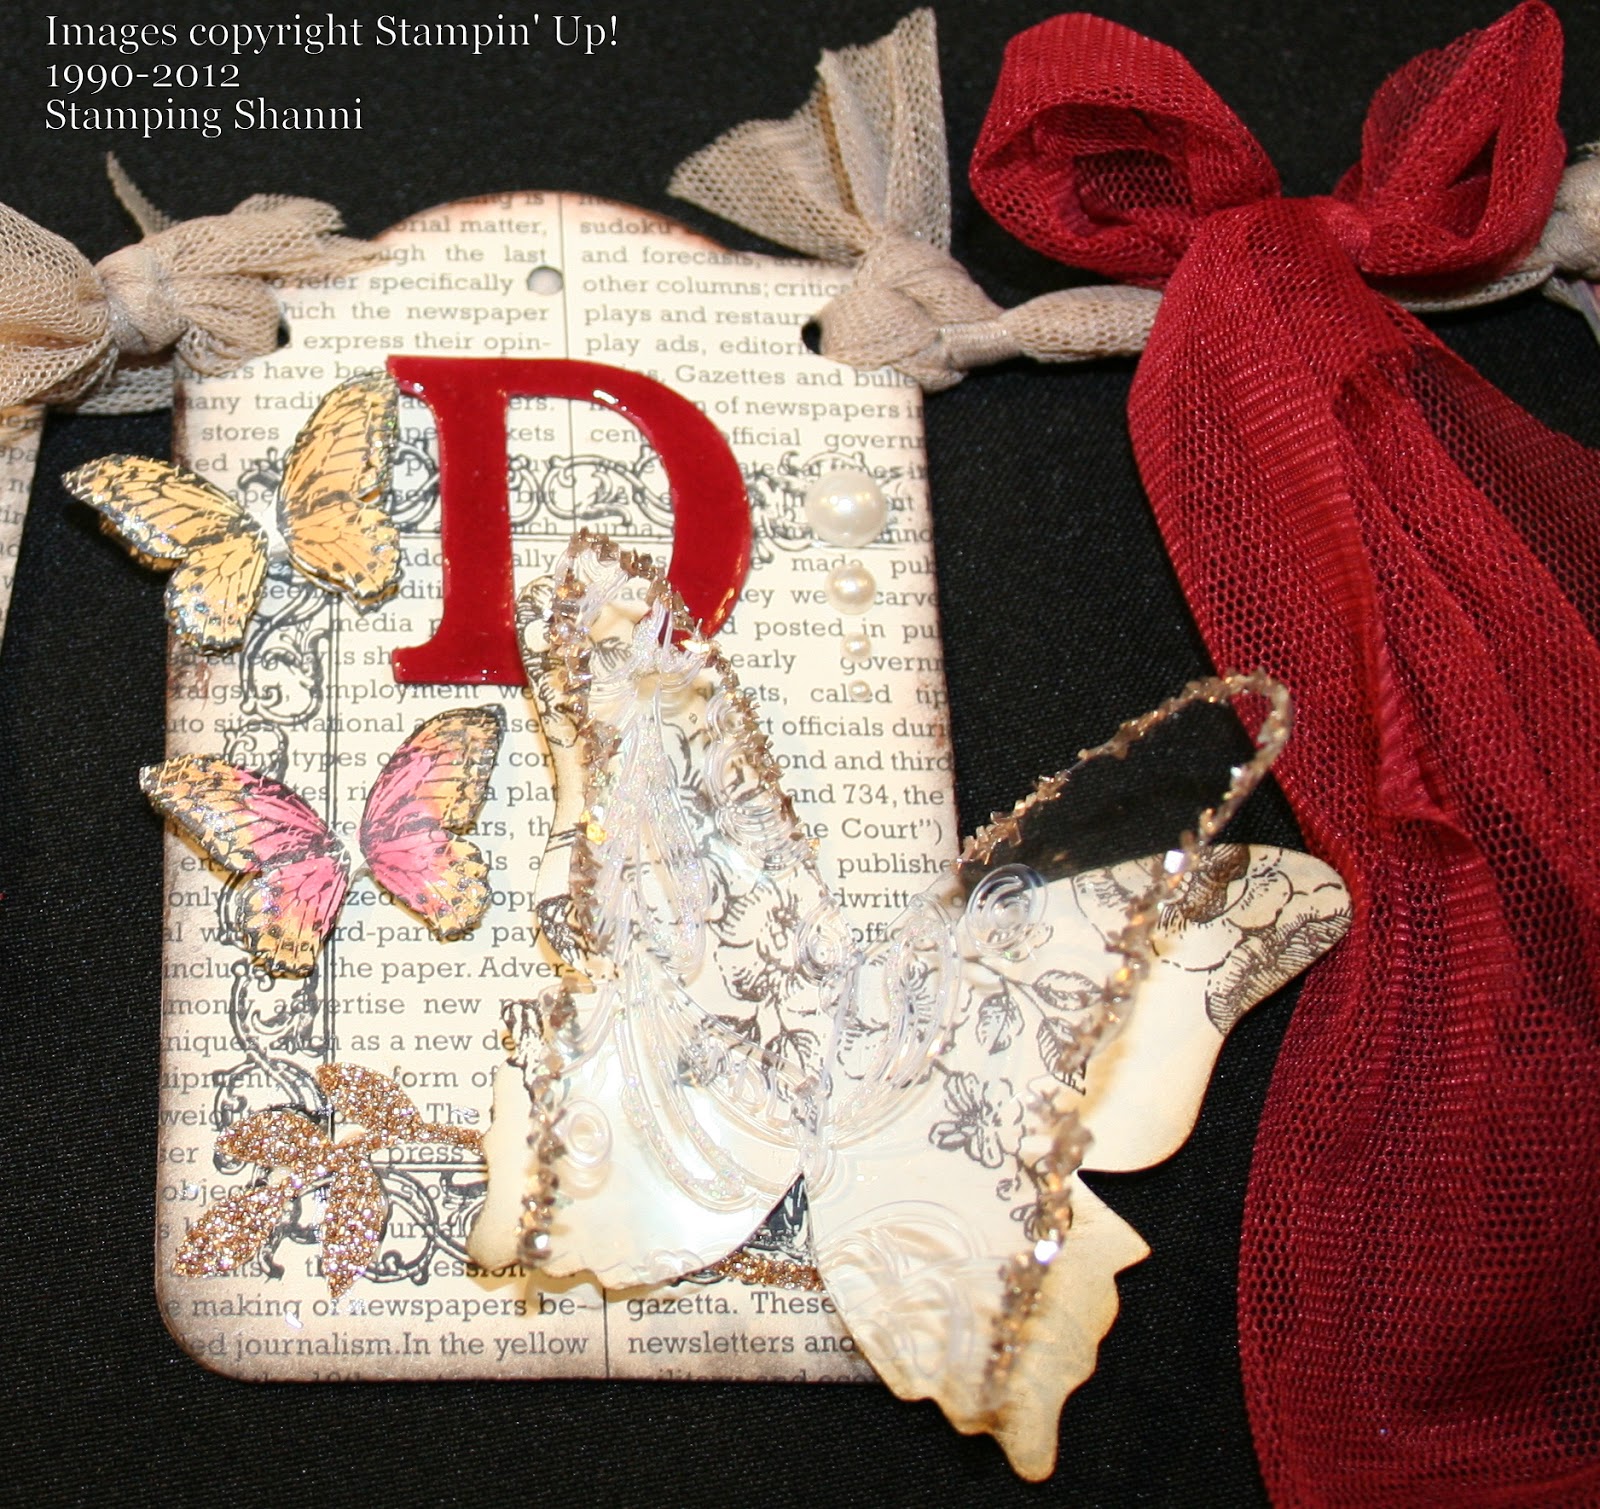
"D" Tag is made the same way as "H" at the beginning with slightly different colour leaves. "E" Tag has mustard single punch roses and little circle twirl fillers along with some Champagne Glimmer Paper leaves from the Builder Bird Punch and Cherry Cobbler Seam Binding Ribbon. I applied the glass glitter directly to the delivery carton cardboard one I had distressed it and cut it with the Large Scallop Edgelit. Background stamping is French Foliage.
I hope that the project has resonated with you in some fashion.
Chat soon
Shanni xx
Very pretty such a lot of very beautiful touches.. Saw this on MIM and had to take a closer peek. Sandy :)
ReplyDeleteGorgeous Banner!! Love the colors and all the details on each piece!! Beautiful!!
ReplyDeleteVisiting from MIM
Hugs
Heather
This is Stunning Shanni. I saw this on MIM..Loz
ReplyDeleteYou've made such lovely tags to make this banner! The details on each and every one is fantastic, and you've used some gorgeous ribbons to tie every piece together! I came over from MIM to visit.
ReplyDeleteOh my! how beautiful is this ... just stunning!
ReplyDeleteHugs,
Marjorie
xx
Fantastic Banner Shanni. Popped in from MIM..Faye
ReplyDeleteGorgeous banner! I'm so glad I saw this on MIM.
ReplyDeleteWow, this is beautiful, love your flowers and all the little decorative elements. Thanks for linking up with MIM this week.
ReplyDeleteRemember, to be in the running to win the prize from our sponsor this week just leave a comment for another entry. Be sure to mention you saw them on Make It Monday. The more entries you comment on the more chances you have of winning!
Hugs,
Sandy
Hi Shanni
ReplyDeleteThe photos are wonderful but really don't truly show just how beautiful this banner is in real life.
Each little tag on this banner is uniquely gorgeous with it's pretty details.
Thank you for sharing with us at Make It Monday this week.
Michelle :o)
Hi Shanni
ReplyDeleteSorry I have not visited for a while , but just keeping up with comments and workshops and DT stuff and caring for Doug fills my day .
Love this whole post every image pure delight . Happy New Year Shanni
Shanni this looks beautiful. Well done Hugs Carolyn
ReplyDelete