Saturday, April 18, 2020

Fancy Folds - Free Standing Pop Up Card

Welcome to another blog hop with the Fancy Folds Design Team. You may have come via my friend Gina's blog - wasn't her card beautiful? I love that every member of our team has a different take on the same design.

This is my project for this month:
I followed the tutorial on YouTube and adjusted the measurements to fit  half an A4 page. I stamped the large floral image from Ornate Style in Night of Navy and coloured it with an aquapainter. Its mounted on a cut out from theOrnate Layers Die pack.
I wanted the colour to be monochrome and only added the slightest wash of colour. The colour from the stamped image leached and added to the depth. I love the contrast of navy and white. The base card is made with thick Whisper White card stock.
On the base I used the scrolled border stamp from the same set and the sentiment from Ornate Thanks. The flower is punched from Night of Navy card using the Small Bloom Punch. Again sticking to the one colour.
The side view shows that the card sits flush in the interior of the card. I made sure that the framelit was glued down very securely to ensure it was able to slide freely! One of my goals was to make it feel limoge-esque - you know the navy and white dinner ware?
This is a really simple fold but has great impact. I think its great for milestone birthdays and thank you notes as it can be displayed nicely. Don't leave us just yet - Mary Ann has a super cute card!


Stay Glittery!

Shanni xx

Order of March Blog Hop

Nadie Schweda (Germany)
Aude Barbara (France)
Fiona Carson (New Zealand)
Gina Connor (United Kingdom)
Shannean Moncrieff (Australia) that's me!
Mary Ann Rossiter (United States)
Astrid Hofmann (Austria)
Stephanie Nash (Canada)

Saturday, March 21, 2020

Fancy Folds - Teepee Fold


Welcome back to another Fancy Folds Global Design Team blog hop. This month we feature the Teepee Fold.  You may well have popped in from my friend Gina's beautiful blog. I always love Gina's delicate touch and flair.

This is my creation:
My base card is made with Soft Sea Foam card. I followed Dawn Griffith's easy to understand YouTube tutorial. However, instead of having three squares of card, had a standard card base and an additional square of card, which was exactly half the card base size; I thought it would be one less join on the card.


I lined the front of the card with Whisper White -  simply created a card mount and cut it on the diagonal. The hardest thing was lining up the background stamp. For the background I used Very Versailles - I love every stamp in this set. I stamped the cursive writing in Smokey Slate and the leaves in Pear Pizzazz.


The cherry blossoms are from the Forever Blossoms set. I stamped these in Soft Suede and coloured them with Stampin' Blends. the colour scheme was inspired by the So Shelli Paper Pumpkin from last year because I think the stamp is very similar to the cherry blossoms from that kit. I used Light and dark Petal Pink, Dark Flirty Flamingo, Dark Soft Suede, and Dark and Light Old Olive. I fussy cut the flowers once I had coloured them.


The sentiment is from Peaceful Moments stamp set. I plan to use the card as a birthday card for my mum. I stamped the words in Tuxedo Black Memento Ink on Whisper White. I punched it out using the Story Label Punch and mounted it on the Pear Pizzazz geometric shape from Detailed Bands Dies.


I hope you feel inspired to try this simple but cute card fold. Don't leave us just yet because the incredible Mary Ann has the most beautiful creation in store for you.

See you next time! Stay well and patient with the world.


Stay glittery!

Shanni xx

Order of March Blog Hop

Nadie Schweda (Germany)
Aude Barbara (France)
Fiona Carson (New Zealand)
Gina Connor (United Kingdom)
Shannean Moncrieff (Australia) that's me!
Mary Ann Rossiter (United States)
Astrid Hofmann (Austria)
Stephanie Nash (Canada)

Saturday, February 29, 2020

Totally Techniques - 3D Punches

So glad that I finally have my tech sorted and can join in to this month's Totally Techniques Design Team Blog Hop. This month we are doing 3D Punches and we have got some awesome projects to share!

I hope you enjoy the offerings.  Here's my card:
The punch I am featuring is the Small Bloom Punch which is a free Sale-a-Bration item with this season's SAB! I have made a square card using Basic Black, I have lined it with a square of the black and white striped Designer Series Paper from the Botanical Prints Product Medley. I embossed a rectangle of Basic Black with the Parisian Flourish #D Embossing Folder - this design is delicious! I think its my new favourite.

To make the flowers I punched three (3) flowers using the Small Blossom Punch and Cherry Cobbler card stock.

1. I texturised the lowers using a bone folder - I do this on a piece of foam from the acrylic block storage container which I have kept (if you haven't got this try using some thick foam).
2. For the centre of the flower I cut between the petals and removed a circle from the centre. I then curl the petals in a spiral using thin nosed tweezers.
3. The second layer of petals is made in the same ways as Step 2 and then I stick two of the petals flush together so that the flower becomes four (4) petals.
4. For the final layer of petals I simply dint the middle of the full flower so that there is a little "well" to sit the other two layers in.
5. I glue them together with Tombow glue

They are really easy to make and I love that we can create them for scrapping layouts, off the page projects and cards.
I also punched the leaves from Mossy Meadow card using the Leaf Punch from the Annual Catalogue. I then folded the leaves in their centre so as to create some dimension and texture.
I nestled the flowers at the top and bottom of the stamped images. The stamped images were simply stamped in Tuxedo Black Memento Ink using the the type set background stamp and the floral stamp from Fanciful Fragrance, stamped in Whisper White card and cut out using the Layering Ovals Framelits.
I stamped the inside of the card too. To ensure that the stamp image was delicate I stamped it off first and the image is second generation.
The flowers sit off the card front by about 1cm or just over 1/4". I used the Pearls to add some glamour to the card. This was the most time consuming laying them in a curl pattern.
I dimensionalised all the layers except the DSP liner. I loved that I could use the Black Dimensionals for this purpose and everything blended in.
The sentiment came from the Fanciful Fragrance stamp set as well but I trimmed off the words "dear you" as I wanted a simple sentiment.
I think that the typeset background looks great when the flowers are stamped through it and I think it adds a touch of sophistication to what would otherwise be a very simple card.
I hope you have enjoyed my take on 3D Punches and that you try to make these easy flowers.

Our other team members have some very clever creations, I highly recommend you check them out!

Until next time, stay glittery!

Shanni xx


You are invited to the Inlinkz link party!
Click here to enter

Saturday, February 22, 2020

Fancy Folds - Joy card

Welcome back to another Fancy Folds design Team blog hop - its so great to have you with us. Chances are you just popped by from Gina's beautiful blog. . .

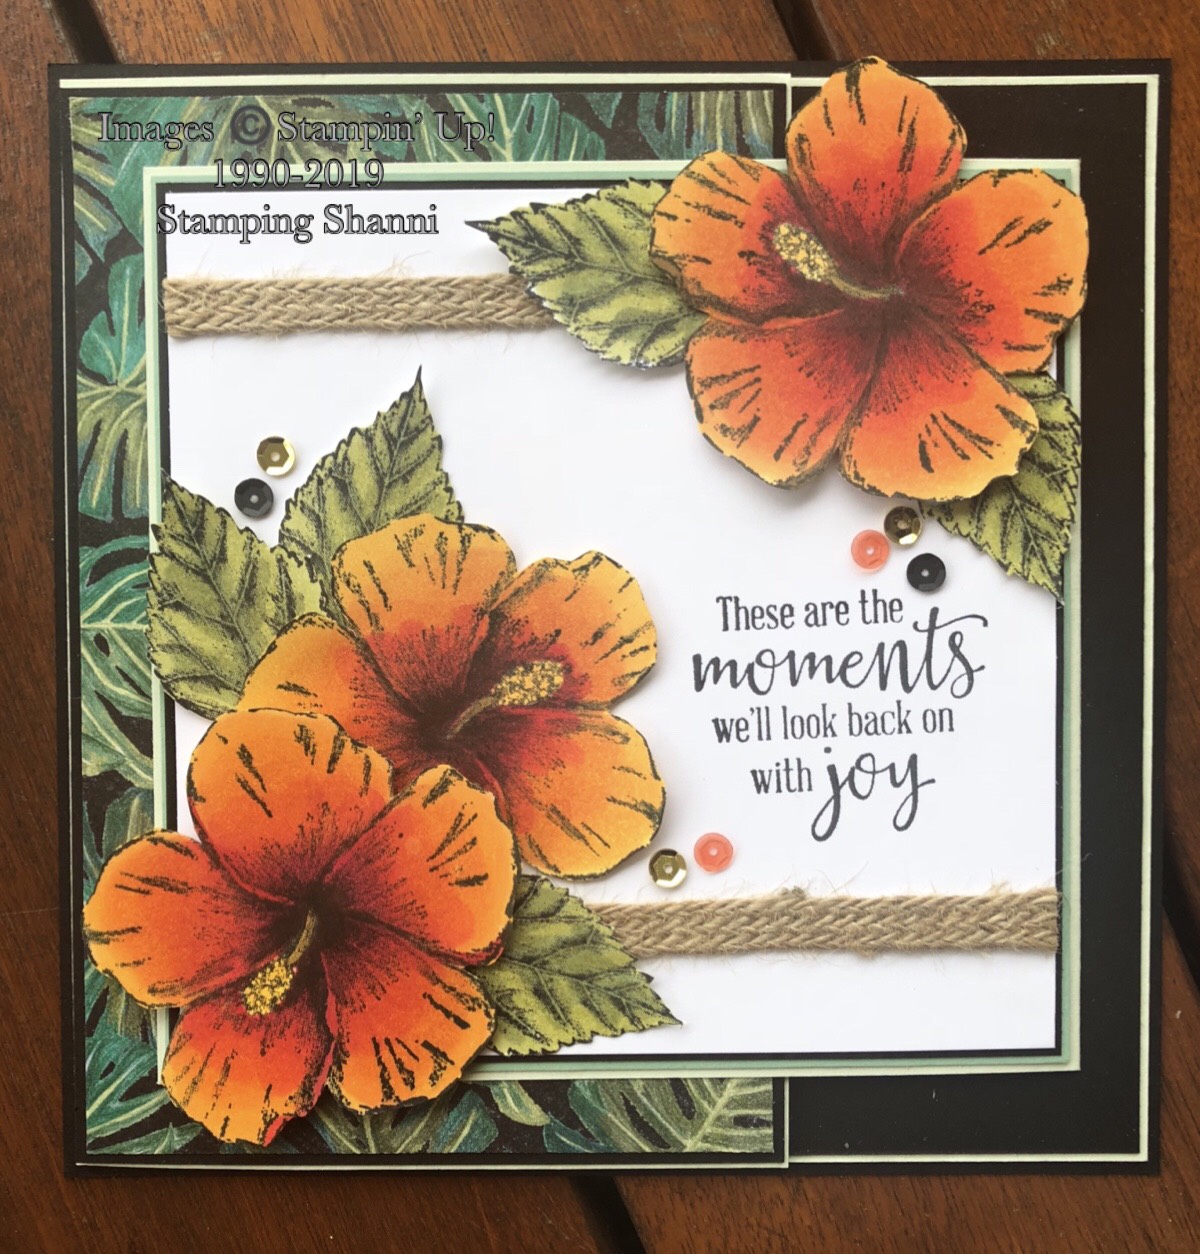
This month we are featuring "joy cards" and here is my project:
I love the Timeless Tropical bundle from the Occasions catalogue and it's quite fitting because tropical holidays are definitely on the agenda at Stampin' Up! at the moment.

I made a square joy fold card which is basically a small double card where one car slips inside the other. the openings cross over. I followed Linda Bauwin's easy YouTube tutorial and just adjusted the measurements to suit making it square.

My base card is Soft Sea Foam, I mounted the base card on Basic Black and inserted a mount of Basic Black on the inside. I wanted to frame the main part of the card and pop the bright colours.
The inserted card is also Soft Sea Foam, mounted with a square of Mint Macaron, Basic Black and Whisper White. The original base card (the larger one which closes with spine at the left) is munted with a rectangle of Basic Black and a printed card from the Tropical Oasis Memories and More Card Pack - it has the printed sentiment - the best is yet to come on it and is simply delightful!
I love this sentiment and thought that the leaves frames the hibiscus flowers on the front beautifully. There is also the Tropical Oasis DSP page in a similar design but the colours are not as deep.
The second aspect of the card with the spine folding from the right - I lined this with Basic Black and Whisper White card as this is where the message would be written. I plan to gift this card to a downline who is very close to earning the next Stampin' Up! Incentive Trip to the Caribbean. 

The front of the card is stamped using Tuxedo Black Memento Ink on Whisper White card and coloured with Stampin' Blends. I used the hibiscus flower from the Timeless Tropical Stamp set. I used: Dark Poppy Parade, Dark Cherry Cobbler, Dark Soft Suede, Dark and Light Pumpkin Pie and Dark Daffodil Delight Stampin' Blends.
For the leaves from the same set I used, Dark Mossy Meadow, Light Old Olive and Dark Mint Macaron Stampin' Blends. I fussy cut the flowers and leaves as I didn't want the little white edge that is generated when you use the In the Tropic Dies.
The sentiment is stamped in Memento Ink using the sentiment from Peaceful Moments stamp set. I added a bit of bling using the sequins from the Peaceful Poppies Sequins pack.
I added a bit of texture with the 8mm Braided Burlap Trim from the Tropical Oasis Suite and created a border at the top and bottom of the front.

I hope you are inspired to try this fold and this suite as they are both beautiful and easy to work with.


Thanks for stopping by!


Shanni xx


Blog Hop Order February 2020

Fiona Carson New Zealand
Gina Connor United Kingdom
Shannean Moncrieff Australia (that's me!)
Mary Ann Rossiter United States
Astrid Hofmann Austria

Saturday, September 28, 2019

Totally techniques - Chalk Boarding Technique


So great to have you back for another Totally Techniques Global Design Team blog hop. We are featuring chalk boarding technique this month and it is such a fun technique. Very simple, but very effective.

Chalk boarding is usually done on very dark card, with stamping in white. You can choose to use White Craft Ink or White Heat Embossing. I prefer heat embossing because it provides for a sharper image, but I have also employed the Craft Ink in a way that is consistent with chalk boarding.

I have done two simple card projects:
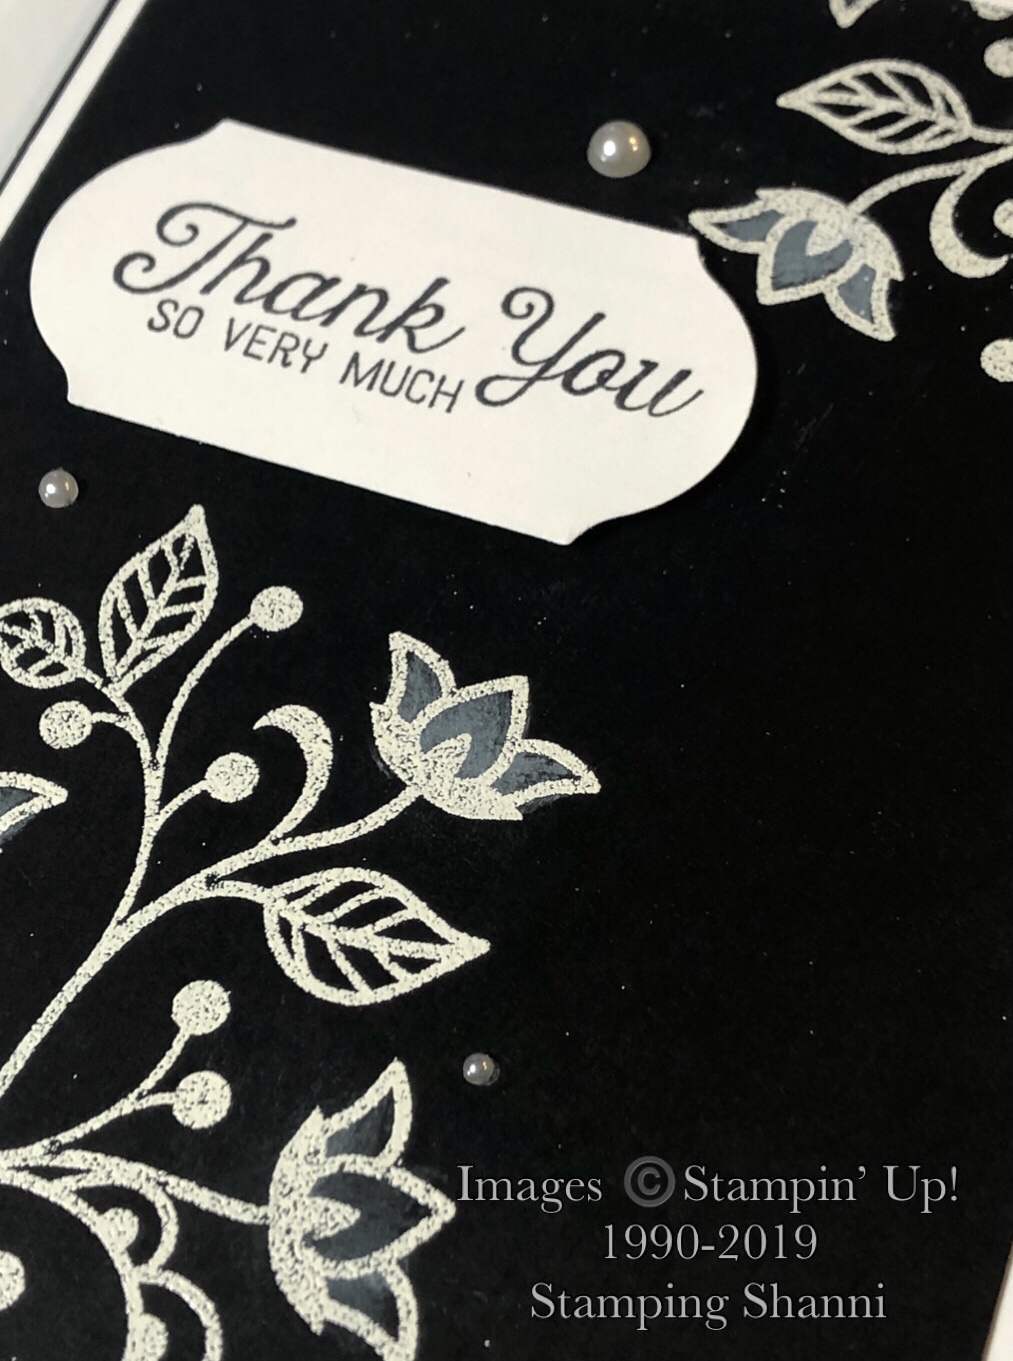
I feature Flourishing Phrases and I have heat embossed with White Embossing Powder on Basic Black card stock. I mounted the top piece on a rectangle of Whisper White and the card base is Basic Black, lined with Whisper White inside.
For the first card I have heat embossed the stamped image and highlighted the flowers of the image only. I used a dry aqua painter to apply Craft Whisper White Ink directly to the card. I stamped the sentiment from the same stamp in Tuxedo Black Memento Ink on Whisper White card and punched with the Timeless Label Punch.
I left the leaves and stems bare for contrast and added some Pearls for a touch of luxe. The pearls marry in beautifully with the chalk style stamping and black and white theme.

For my second project I have used the same stamp and colour scheme but in addition to heat embossing in white I have also distressed over the areas of the stamp image with Whisper White Craft ink, using a sponge. 
I wanted to give the impression that the black board had been used previously and the chalk residue left on the board.
The sentiment in this instance was stamped on Whisper White in Tuxedo Black Memento Ink and punched out with the Story Label Punch.
You can only just see that there are some black Rhinestone Jewels on the card to provide a little glamour!

Such an easy technique and two easy cards for inspiration enjoy.

Until next time
Shanni xx

You are invited to the Inlinkz link party!
Click here to enter