Saturday, July 18, 2020

Fancy Folds - Triple Cube Pop Up Card

Welcome back to another Fancy Folds Design Team Blog Hop - this month we are a few demos short but those who are here have pulled out all the stops. We are highlighting Triple Cube Pup Up Cards this month. You may have just been visiting my beautiful friend Gina in Northern Ireland. I love Gina's project - this woman is sooooo creative!

Here is my project:
I followed the very detailed YouTube tutorial from The Artful Inker, but then I came up wit my own measurements. Basically you use a standard base size card and score it in four equal areas so that you can make the cube. Yu then select two more pieces that are exactly half of the card height to make the two smaller cubes on the left and right - make sure you score these lengths in four places too. You will get the gist of it from the YouTube presentation; don't be afraid to use your own card sizes, just keep them uniform!
For the project today I used Basic Black as my card base and coupled this with the In Good Taste Designer Series Paper - I love the natural timber and stone look and thought they would go well with the images from the Tasteful Touches stamp set.
I love the contrast between the woodgrain DSP and the solid coloured flowers. And I wanted to position my flowers off the edges of the DSP to give it a more random but balanced look.
The flower stamp from the Tasteful Touches is stamped in Memento Tuxedo Black Ink on Whisper White card and coloured using the Light and Dark Cherry Cobbler, Light Poppy Parade and Dark Mango Melody Stampin' Blends:


I stamped a heap of them so that I would have enough for the project. I wasn't too concerned about going outside the lines because I knew I was going to fussy cut the flowers for the project. I am pretty hit and miss on how I colour but this stamp is so forgiving.
I stamped directly on the DSP with the leaf sprig in Mossy Meadow. I love the filigree style of the leaf stamp and think that it balances the vintage feel of the flower images.
The sentiment is from the same set and stamped in Memento Tuxedo Black Ink on a piece of Whisper White. the card was 2.5cm wide and I used the Lovely Labels Pick a Punch to clip the ends.
I wanted the card to be able to close and look just as good as when it's open so that the recipient enjoyed the visual impact of the bright flowers on the dramatic background.
 Dimensionals mean that the centre flower sits above the outer two.
The card feels really light and can be send in a standard 6" x 6" envelope which is always an importnt consideration.
This is what the card looks like from above. The DSP is so gorgeous! I think this is my favourite suite in the new cattie.
Side view to show that the flower inside the bottom left cube sits perfectly when the card is folded.

I hope you have felt a little inspired to try this card it is seriously easy with a great impact. I am going to make some other projects using the same fold!
Don't leave us just yet.  Mary Kay has been so creative, despite being busy with her family this summer! Mary Kay has an awesome project this month! I love MK's style!

Until next time, stay sparkly!

Shanni xx


Order of June Blog Hop

Gina Connor (United Kingdom)
Shannean Moncrieff (Australia) that's me!
Mary Ann Rossiter (United States)
Astrid Hofmann (Austria)
Stephanie Nash (Canada)

Saturday, June 20, 2020

Fancy Folds - Corner Flip Card

Welcome back to another month blog hopping with the Fancy Folds Design Team, this month we are featuring Corner Flip Folds. I hope you loved Gina's project as much as I did!

I followed the easy to understand tutorial by Dawn O! This is my card this month:
Featuring the Forever Fern stamp set, I have made a rectangular card as per the measurement details of Dawn's video out of WhisperWhite Thick Card.
I texturised the card with the Tasteful Textile 3D Embossing Folder after I had cut the fold into the front of the card. I then lined the inside and the top half of the the card with a rectangle and square of the Perfect Peacock card and then mounted that with Whisper White card.
On the front I mounted the square with leaves cut using Pretty Peacock, Vellum Card and Whisper White Card cut using the Forever Fern Dies. I stamped the leaves stamp in Mossy Meadow x 4 on Whisper White, cut them with the matching die, and daubered the plain white card with Pretty Peacock ink to make it pop a little.
I layered the leaves around the gold hoop embellishment and stamped the fly poo stamp from the Forever Fern set in Tuxedo Black Memento Ink. I stamped the sentiment in versamark and heat emboss white on Basic Black and hand cut the small rectangle. I adhered everything with dimensionals and tombow glue.
For a final touch I coloured some Rhinestone Jewels with the Dark Basic Black Stampin' Blend and adhered them randomly where they balanced the layout.

I hope you feel inspired by this months hop, thanks for stopping by! Don't leave us just yet - Mary Ann has a fabulous project for you to see!
Until next time, stay glittery!

Shanni xx

Order of June Blog Hop

Nadine Schweda (Germany)
Aude Barbara (France)
Fiona Carson (New Zealand)
Gina Connor (United Kingdom)
Shannean Moncrieff (Australia) that's me!
Mary Ann Rossiter (United States)
Astrid Hofmann (Austria)
Stephanie Nash (Canada)


Saturday, May 30, 2020

Totally Techniques - Water Colouring


We are back for another Totally Techniques Design Team blog hop and this month we are featuring water colouring!

This is a great technique and is particularly popular with backgrounds but because I thought others on the hop might feature that I wanted to try my hand at a few different styles of water colouring. These are very clean styles - not my usual layering at all.

My first card is simple stamping with Tuxedo Black Memento Ink (in this case on Whisper White card) and straight forward colouring using our classic ink pads and an aqua painter.
Jacque Williams' stamp set Beautiful Moments truly lends itself to water colour painting. I used Perfect Peacock, Mossy Meadow, Old Olive, Pool Party, Soft Suede and Daffodil Delight.
I finished with a bit of highlighting using the clear Wink of Stella. Th sentiment is from the For the Love of Felt, stamped in Memento on Whisper White and punched out with the Timeless Label Punch.
The shimmer adds a touch of bling to the images and ties in the colours in the foreground and bak ground.

Next I thought I would share a technique many stampers are using which is water colouring direct on to card then cutting the colour washed area wit a framelit to complement an image. This is my second card:
So I used the Botanical Tags Dies to cut out the images you see on the front of this card. I made the ombre shades using Rococo Rose, Cherry Cobbler and Old Olive ink pads and an aqua painter on Whisper White card. The tip is to have plenty of water through the brush.
Once you have washed the card with the ink colours of your choice, you wait for it to dry then cut out the die image. I fussy cut the edges of the leaves and the flowers because the die is actually a tag shape and the flower usually marries direct onto the tag area. The background was embossed with the Woodgrain Textured Embossing Folder.
The sentiment was heat embossed with White Stampin' Emboss on Basic Black card and cut out using the Timeless Label Punch.

My third and final card was standard no line water colouring:
I stamped To a Wild Rose in Crumb Cake on Whisper White and coloured the flower in Cherry Cobbler and the leaves in Mossy Meadow and Old Olive.
I used an aqua painter with the classic ink pads. I wanted to keep the image plain and simple.
Once the water colours had dried I came back in and added some extra detail with the Cherry  Cobbler ink pad to create more shadow. It was very relaxing to colour. The sentiment is the same used in the other cards, stamped in Memento Ink.

I hope yo have enjoyed my projects and have found some inspiration ~ I now that rest of the team have some truly awesome cards to share.

Until next time,

Shanni xx
You are invited to the Inlinkz link party!
Click here to enter

Saturday, May 16, 2020

Fancy Folds - Double Easel Card

Welcome back to another month of blog hopping with the Fancy Folds Design Team  - this month we are doing Fancy Folds.

I hope you enjoyed the amazing project that my friend Gina made with the fancy fold!  

This is my card:
I followed the easy to understand YouTube tutorial from by my beautiful friend Sharon Armstrong, she makes it very easy to follow.
I made my card using Thick Whisper White card stock - the base card and the second easel aspect. I also used a strip of Tropical Oasis Designer Series Paper down the right hand side of the card. It doesn't matter what width you use - its just a pop of colour to brighten the overall card.
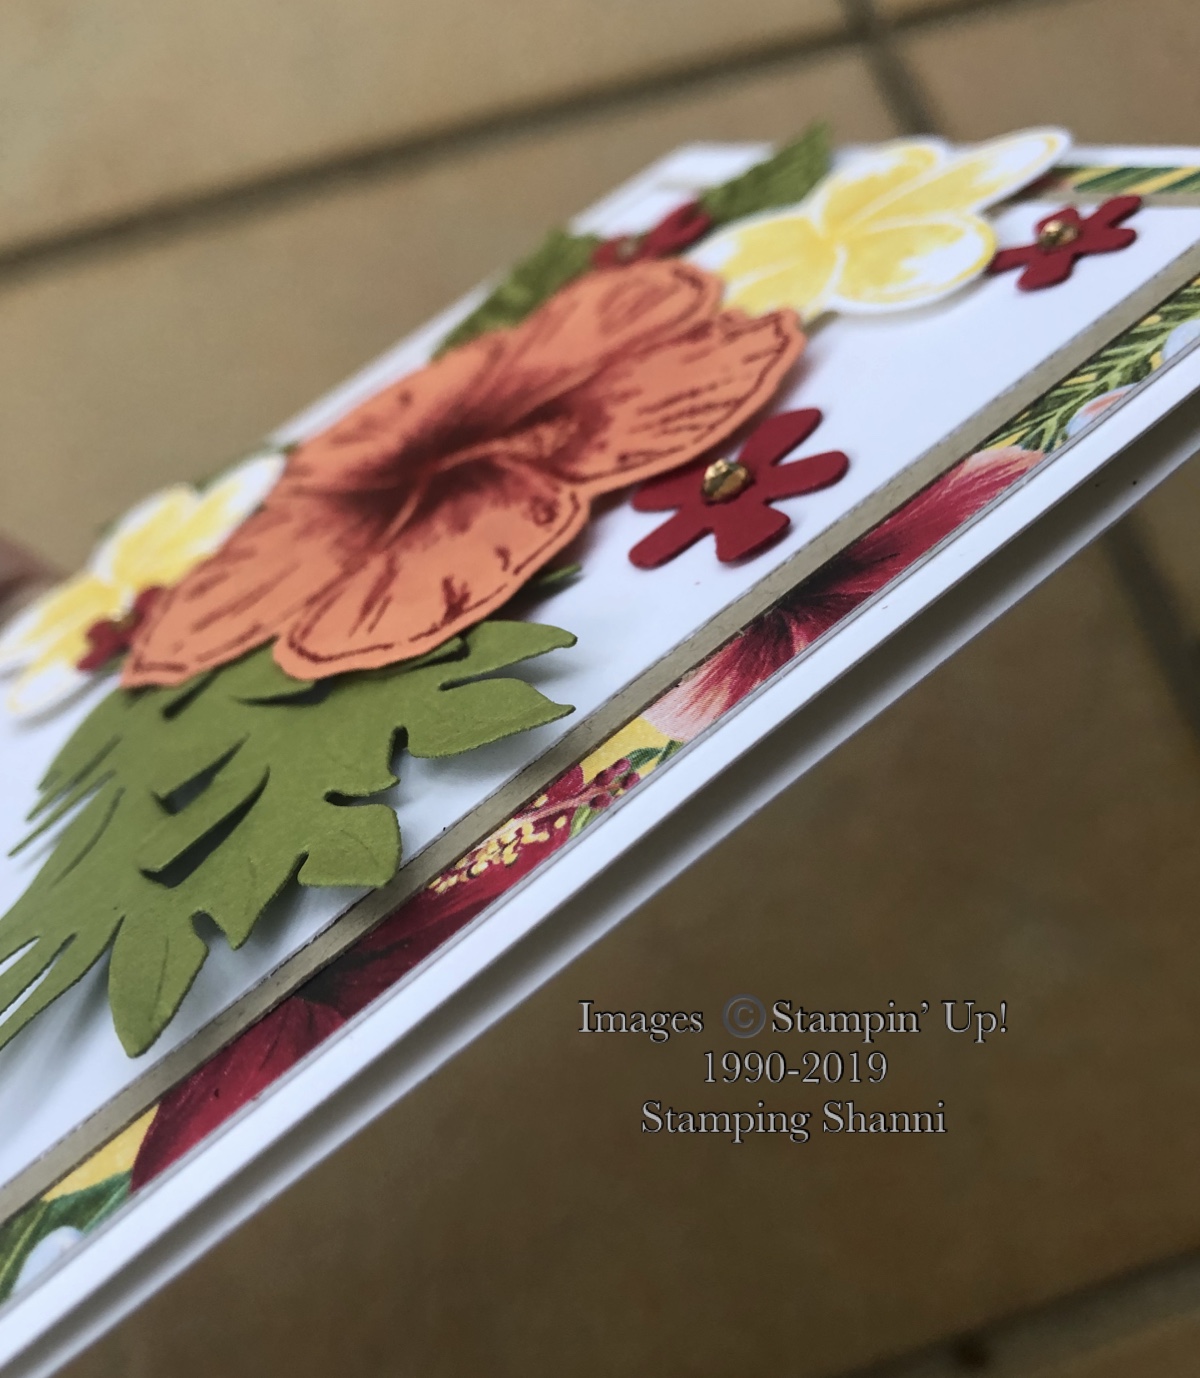
I stamped the images from the Timeless Tropical stamp set as follows - the hibiscus on Grapefruit Grove in Real Red, the frangipani flowers in Daffodil Delight on Whisper White and the leaves in Old Olive on Old Olive card stock. I also added some extra bling to the flowers by colouring the centres with Wink of Stella and the ink colour that each flower was stamped in.
I love that the stamped images could all be cut out using the In the Tropic Dies. I also cut the pineapple top in Old Olive card and the little flower sprays in Real Red card stock.
To give the card a focal point I added a rectangle of Crumb Cake and Whisper White card as the feature on the large easel card.
The sentiment is from the Timeless Tropical set stamped in Real Red and mounted on crumb cake (punched with the Story Label Punch). I punched the sentiment stamped image with the Timeless Label Punch. Everything is attached with dimensionals to pop them from that card base.
I hope that the design gives you some inspiration to try the fold. Its really easy and has great appeal.
Don't leave us right now,  you could check out our next design team member,  Mary Ann has made a super cute card!

Give this fold a try - I think you will like it!


Thanks for hopping with us today!

Stay glittery
Shanni xx

Order of March Blog Hop

Aude Barbara (France)
Fiona Carson (New Zealand)
Gina Connor (United Kingdom)
Shannean Moncrieff (Australia) that's me!
Mary Ann Rossiter (United States)
Astrid Hofmann (Austria)
Stephanie Nash (Canada)

Saturday, April 18, 2020

Fancy Folds - Free Standing Pop Up Card

Welcome to another blog hop with the Fancy Folds Design Team. You may have come via my friend Gina's blog - wasn't her card beautiful? I love that every member of our team has a different take on the same design.

This is my project for this month:
I followed the tutorial on YouTube and adjusted the measurements to fit  half an A4 page. I stamped the large floral image from Ornate Style in Night of Navy and coloured it with an aquapainter. Its mounted on a cut out from theOrnate Layers Die pack.
I wanted the colour to be monochrome and only added the slightest wash of colour. The colour from the stamped image leached and added to the depth. I love the contrast of navy and white. The base card is made with thick Whisper White card stock.
On the base I used the scrolled border stamp from the same set and the sentiment from Ornate Thanks. The flower is punched from Night of Navy card using the Small Bloom Punch. Again sticking to the one colour.
The side view shows that the card sits flush in the interior of the card. I made sure that the framelit was glued down very securely to ensure it was able to slide freely! One of my goals was to make it feel limoge-esque - you know the navy and white dinner ware?
This is a really simple fold but has great impact. I think its great for milestone birthdays and thank you notes as it can be displayed nicely. Don't leave us just yet - Mary Ann has a super cute card!


Stay Glittery!

Shanni xx

Order of March Blog Hop

Nadie Schweda (Germany)
Aude Barbara (France)
Fiona Carson (New Zealand)
Gina Connor (United Kingdom)
Shannean Moncrieff (Australia) that's me!
Mary Ann Rossiter (United States)
Astrid Hofmann (Austria)
Stephanie Nash (Canada)