You may be just joining us from Zoe Tant's beautiful blog - wasn't Zoe's project just gorgeous? I love that the project is so simple and effective! Let's hope you get inspired with all of the projects we have to share.
The brief was:
*Stamp and ink only
*One layer
*Accessories optional
This is what I started with - so I suppose you can say that this is my project:
For my projects today I have used the following Stamping' Up! products:
* Whisper White Note Cards & Envelopes (131527)
* Tuxedo Black Memento Ink (132708)
* Touches of Texture Stamp Set (141934)
* Thankful Thoughts Stamp Set (141519)
I have literally stamped in black ink on white card stock. I wanted to keep it clean and simple. A fabulous example of #simplestamping if ever there was one. This floral stamp set lends itself to so many projects and can be used from a variety of occasions. Here is a close up of the stamped image:
The font of the sentiment stamp set from the Thankful Thoughts set complements the style of the flower stamp perfectly. Now you know that I can't just keep things totally simple so I stepped up this design by layering the stamped image on the front (not quite keeping to brief), it's still simple stamping but with an added layer. . .
I simply centred the stamped image and left out the sentiment. I stamped on Whisper White Card Stock and mounted the rectangle on a slightly larger rectangle of Basic Black Card Stock. All card bases in this instance are the Note Cards available in the Annual Catalogue.
Because of the clean outlines this stamp set lends itself to so many techniques - colouring, paper piercing and so much more. . . which lead me to the next idea. . . stepping the card design up a little. Imagine if we stamped on DSP? And I love the wood grain pattern in the Festive Farmhouse Designer Series Paper pack in the Holiday Mini Catalogue which is only available for a few more days. . .
Stamping directly onto DSP is a brilliant way to add a bit more pizzazz to a project without complicating things too much. Again the only change I have made to this project is to stamp directly onto the Festive Farmhouse DSP in Memento Ink. The DSP is mounted directly onto the Note Card.
I love the look of the white washed wood grain through the stamped image. Very simple stamping. . . So imagine if we were to add a touch of colour. . .
For this card (again using a Note Card and the Festive Farmhouse DSP) I stamped in Memento Ink and coloured the flower buds with the Dark Mango Melody Blend and the leaves with Light Granny Apple Green Blend. The open flowers have been stamped using the small stipple stamp from the Touch of Textures Stamp Set in Lovely Lipstick ink. I added three Pearl Jewels for a touch of glam!
The Mango Melody Blends (147945) are only available in the Holiday Mini Catalogue so don't miss out. You can see that the Lovely Lipstick stamping is not even "inside the lines" - but the effect is awesome and it is still a very simply stamped card. . . Check out the next evolution. . .
I love colouring in and there is nothing simpler than colouring in a nice clean stamped image. This image is stamped in Memento Ink and coloured using Light Lovely Lipstick, Light and Dark Flirty Flamingo, Light Granny Apple Green and Light and Dark Sea Foam Blends. The stamped image is mounted on a Basic Black Card background on the Note Card.
There is nothing more satisfying than colouring in and with the blends it is a simple stamping project with a touch of colour! I know - I am a rule breaker . . . but this stamped image was calling out for some love. . .
I wanted to show you that you could stamp with just one colour and one stamp set and make some beautiful projects - this card involves masking with a post-it note and moving the stamp a little each time you stamp to change the appearance of the stamped image.
For this card I simple covered the stamped image with a post-it note and stamped the next image on a 25 degree angle at say 2 o'clock over the masked stamped image. I stamped three times in total. Very effective and still simple stamping but with a simple technique thrown in! Now what would happen if we added a touch of colour to an image stamped like this? Well I had to try it out. . .
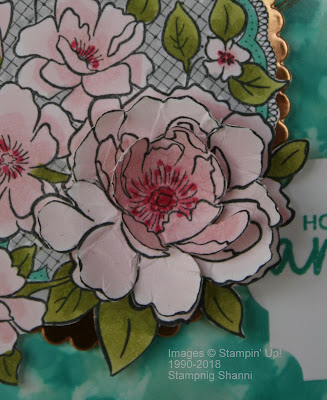
I coloured the flowers with Coastal Cabana ink and an aqua painter, the flower centres were coloured with a Dark Lovely Lipstick Blend pen and the leaves with the Light Granny Apple Green Blend pen. For an added touch of difference I stamped the main flowers in the image three more times, coloured them with the same ink, fussy cut them out and stuck them on top on the flowers with TomBow Glue.
I would argue that it is still simple stamping with a little effort invested. . . Here's another example of simple stamping. . . Because I had the aqua painter and the Lovely Lipstick ink pad and Blend pen on the table. . . I thought, why not add some popping pink to the equation?
The biggest impact here is the background - I painted the background with a clean wet aqua painter, spreading water to wet the card stock without adding any ink (this means the ink application goes mores smoothly). I then loaded the aqua painter with ink from the Lovely Lipstick Ink Pad and washed it over the background. I splattered the excess ink residue from the aqua painter by tapping it on a bone folder over the card. I cleaned out the aqua painter then splattered some more spots of clean water on the background for good measure.
This is the same stamp masked once and stamped twice in Memento ink. The stippled centres are stamped in Lovely Lipstick and the buds coloured using the Lovely Lipstick Blend pens. I also stamped the larger stippled stamp from the Touch of Textures stamp set in Crumb Cake. The pearl jewels are added to break up the colour a bit. . .
Keeping with the simple stamping theme I thought it important to show how to stamp using the Stamping' Write Markers as the method or tool for inking up a stamp to provide a simple stamped image.
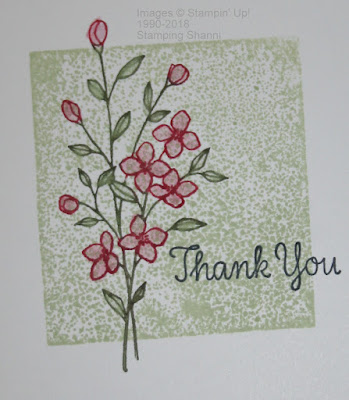
I inked up the stamp with the Real Red and the Mossy Meadow Stamping' Write Markers using the brush nib. I then coloured the image using an aqua painter and simple leaving the colour from the stamped outline into the void of the stamped image.
I adhered the stamped image to the Note Card using the Suite Season Specialty Washi Tape from the Holiday Mini Catalogue. . . the sentiment is stamped in Memento Ink. Stepping this card up just one level, I did this:
The image is inked and stamped the same way as the card above, the only difference is the background which I created using the "D" size Clear Stamping Block inked with the Soft Sea Foam ink pad and stamped over the coloured stamped image.
This is great way to get more value from your clear stamping blocks and is a neat background for all types of projects. I think this is the best type of simple stamping. . .
So ten Note Cards in the pack, and ten different simple stamping projects using the one main stamp set and a few different coloured ink pads, blend pens, Stamping' Write Markers and tools. . . I know that everyone could replicate these projects really easily!
I hope you are feeling inspired to give simple stamping a try. Don't leave us just yet because there is a fabulous project on Barbara Meyer's blog, Barbara always blows my mind with her amazing creativity! I love her project this month and am sure that you will too.
I hope that you all embrace #simplestamping and that you share your projects with others.
Until next time, stay glittery!
Shanni xx
December Blog Hop Order
Zoe Tant United Kingdom
Shannean Moncrieff Australia (that's me!!)
Barbara Meyer Austria
Annette Elias Netherlands
Kelly Acheson United States
Marine Wiplier France


