Wednesday, April 30, 2014

Amazing Soho Subway

Hardwood goes so well with the Soho Subway Designer Series Papers because of the colours, texture of the subjects of the pages and the slightly distressed appearance of the papers. This is my card that features both of these beautiful products:
Summer Starfruit is not a popular colour with many of my downline or customers but I love it and try to use it in ways that appeal to people.  I think that it is a colour which goes well with Black, Island Indigo, Early Espresso and Night of Navy. Here I have mounted the DSP page on Island Indigo. You can see that I have pierced the edge of the DSP for some added texture.

The Sentiment is from Chalk Talk and I have used the framelit dies from Chalk Talk and Apothecary Accents Dies for the features behind the sentiment. I fussy cut around the edge of the sentiment so that it could be mounted on another piece of Summer Starfruit lol.
I have stamped two butterflies from the Papillon Potpourri stamp set and punched them out with the matching punches - Elegant Butterflly and Itty Bitty Butterfly along with one from the Beautiful Wings Embosslit die which I used with a piece of the Island Indigo page from the Soho Subway DSP pack. The Rhinestone Jewels are to add a bot of glamour and sparkle to the card.

Antique brads are the finishing touch.

Enjoy!
Shanni

Tuesday, April 29, 2014

Just Because Soho Subway is So Sensational

I have six brothers and three brothers in law so the need for masculine cards is ever constant. This is my latest Soho Subway DSP card:
The Open Sea is my go to stamp set for blokey cards. I have stamped it here in Midnight Muse with the bills of lading stamp behind it in Crumb Cake. The frame is simply fussy cut after being embossed with the rectangular Designer Frames TIEF in Soft Suede cardstock. The edges are daubed in Early Espresso. I mounted the framed ship on a Hardwood stamped feature that I wanted to look like a piece of jetty.

Antique brads are to add to the nautical theme and these aspects are mounted on an Apothecary Accent shape that I also embossed the Crumb Cake with the Pretty Print TIEF. Of course the daubing on the edges is to add to the distressed theme.

I am loving the sentiment "just because" from A Dozen Thoughts. I have strung the Linen Thread back and forth behind it for texture and to give it a more masculine feel.
The DSP background is from Soho Subway DSP and is primarily a tone of blue which is a cross between Soft Sky and Marina Mist, Crumb Cake and Early Espresso. I mounted it on a piece of Soft Sky and the base card is Crumb Cake.

Loving this particular design from the Soho Subway DSP suite.

Back later
Shanni

Monday, April 28, 2014

Soho Subway Birthday

All the birthdays in my life seem to fall between May and September - this is a prolific time for gifts and the need for cards peaks. So a birthday card never goes astray.

This is today's birthday card made using Soho Subway DSP:
The background is Hardwood stamped \on Crumb Cake mounted on Earely Espresso. I daubed the edges with Early Espresso to add to the aged look of the card. I used two pieces of Soho Subway DSP - the one with random numbers mounted on Island Indigo and a piece of predominantly Summer Starfruit mounted on the same colour. Between the pieces is a small length of Burlap Ribbon for some textural interest.

Label Love has an amazing selection of sentiments. I have stamped this on Very Vanilla in Early Espresso and fussy cut so that it can be mounted on the matching Artisan Label punched piece (in Early Espresso).
I added the Antique Brad and the tiny butterflies from the Beautiful Wings Embosslit die for texture and interest.

One down, eleven to go. . .
Shanni

Sunday, April 27, 2014

Another Soho Card

I love flowers on cards which is a good thing because Stampin' Up! has a plethora of flower stamps to choose from and even if the designer series paper is unlikely to match flowers I will always push my boundaries. . .

Today's card:
Base card is Early Espresso with a Summer Starfruit mount. I have then used the wooden stencil letters paper from the Soho Subway DSP as a backdrop to the stamped point of interest.

I have used the Hardwood stamp to create a fence (with a punched out Early Espresso heart) ~ I wanted it to create an over grown feeling with the flowers and leaves. The leaves are a combination. I have cut out Old Olive cardstock using the leaves from Secret Garden Framelit Dies. Summer Starfruit card was cut using the Sizzlet Little Leaves and I stamped the leaves from Peaceful Petals in old olive on Whisper White and fussy cut them out.
The flowers are stamped from the Petite Petals set in Real Red on Whisper White cardstock and punched using the matching punch and daubed in the same ink colour. The Pearl Basic Jewels add texture. I also punched the flowers from the Itty Bitty Punch Pack in Whisper White with the tiny pearls for their centres

Hope that it appeals.
Shanni


Saturday, April 26, 2014

Soho So Grunge!

I love the colours in the Soho Subway DSP so much - they are primarily Summer Starfruit, Early Espresso, Soft Suede, Baked Brown Sugar and Night of Navy - all the colours that appeal to my taste!

Here is today's card using the Soho Subway DSP:
My base card today is Baked Brown Sugar which I have mounted with a piece of Whisper White cardstock daubed around the edges with Baked Brown Sugar ink. Then I mounted a piece of the geometric Summer Starfruit designed page from the Soho Subway DSP pack.  The actual word Soho is from one of the worded pages in the same DSP pack and I have mounted it on Early Espresso.

There is a suggestion of Island Indigo in the background of the wording so I punched a piece of Island Indigo cardstock with the Chevron Border Punch and mounted a "negative" piece - you know the piece that usually ends up in the bin - of Summer Starfruit cardstock on the punch out for interest.
Next I cut a piece of Summer Starfruit using the Starburst Framelit Dies, punched a circle of Gold Foil Paper with the 1 3/4" Circle Punch. I think the gold adds a touch of glamour and really draws your eye to the sentiment which competes with the "soho" background. I stamped the sentiment from the Starburst Sayings stamp set in Early Espresso on Whisper White card and punched it out with the right sized Circle Framelit Die to match the rest of the embellishment. It is double mounted with dimensionals.
As an added touch of texture and interest and because the Soho district in New York is kind of old world artisan I added some sequins from the Gold Sequin Trim to the arrow from the Essentials Wooden Elements pack.

So cute right?
Shanni

Friday, April 25, 2014

So loving Soho Subway DSP

My team members call me Shannean the Queen - they like to stir me about it so I give as good as I get and generally embrace the Moniker to raise their ire even more. It is an ongoing joke . . . but I think that this card with Soho Subway is a great play on words because I am sending it to one of my team who has been particularly helpful over the past few months: 
The base card is Early Espresso mounted with Blushing Bride which I have embossed with the Alphabet Press TIEF. This embossing folder works so well with a number of the pages from the Soho Subway DSP that I don't often look past it I am afraid.

I love the marquee style stamp in the Starburst Sayings stamp set and have stamped it here in Summer Starfruit and Blushing Bride ink and cut them out with the matching Starburst Framelit Dies. I also stamped the sentiment from the same stamp set in Early Espresso and cut it out at the same time and mounted it on the starburst shaped Essentials Wooden Elements piece. I cut an additional starburst in Summer Starfruit.
Like yesterday's post I used a piece of Summer Starfruit Stitched Satin Ribbon which is being retired at the end of June (along with the inks, card and other products in the 2012-2014 In Colour family). And I added some gold Watercolour Wonder Designer Washi Tape because the tones go so well together.

Isn't interesting how different a card can appear when it is made in portrait layout instead of landscape (as yesterday's was)?  Hope you are getting some ideas.

Thanks
Shanni

Thursday, April 24, 2014

Soho Subway is going away. . .

Our Retirement List is almost upon us here in the South Pacific, the US one was released last week so I am in the midst of working out what papers to use first. I adore the Soho Subway suite, the colours are so rich and evocative of age, history and vintage wear and tear. I thought that I might feature a few of my recent projects using the Soho Subway DSP.
The base card is Early Espresso and I have mounted a piece of Blushing Bride cardstock. I embossed it with the Alphabet Press TIEF to marry in with the signage theme of this particular page of the DSP. I cut an additional piece of the printed newspaper page of the Soho Subway DSP along with the segment about Radio City and mounted both of them on Early Espresso cardstock.
I stamped the marquee styled stamp from Starburst Sayings in Blushing Bride and Summer Starfruit ink on Very Vanilla cardstock and cut them out with the matching Starburst Framelit Dies. I also stamped the sentiment from the Starburst Sayings set in Early Espresso, cut it out with the matching die and mounted it on an Essentials Wooden Element disc.

For texture and interest I used a piece of Summer Starfruit Stitched Satin Ribbon and some gold Watercolour Wonder Designer Washi Tape. I hope that you have taken some inspiration from the card.

Ciao for now
Shanni

Wednesday, April 23, 2014

Silhouetted Epic Day

A quick and simple card with a bit of impact. And for once I didn't make a square card but the usual C6 size lol.
As per usual the base card is Crumb Cake; it matches perfectly with this particular page from the This & That Epic Day DSP (which is mainly Pool Party). The Burlap Ribbon goes with both the stamped image, the base card and the colour scheme on the DSP. I added the narrow strip of Basic Black cardstock for interest.
I stamped the image from Serene Silhouettes in Staz On Jet Black Ink on Whisper White cardstock. Using daubers I spread colour across the image from bottom to top - Crushed Curry, Pumpkin Pie and Pool Party. I had punched a circle with the 1 1/4" Circle Punch from a post-it for the moon and inked over the top of this creating a masked circle.

Finally I punched the whole stamped and coloured image with the 2 1/2" Circle Punch and mounted it on Basic Black cardstock cut with the Window Frames Framelit Dies. It is mounted over the burlap with Dimensionals.  The sentiment is from the Six Sides Sampler stamp set.

Cheers
Shanni

Tuesday, April 22, 2014

Epic Day - Oh Happy Day

I can make modern, funky cards. . . but I normally lean towards the more romantic, vintage style of yesteryear. But here is a card with a contemporary theme:
My base card is Smoky Slate and I have mounted a piece of Basic Gray on top of this beneath the Calypso Coral This & That Epic Day DSP piece. I mounted a piece of the chevron page from the same DSP pack and strips of the Epid Day Washi Tape on the card for interest and colour.
I love the Hung Up Cute Clips which go so well with this DSP and suite. The little arrow doubles as a paper clip if I need to add a number for an aged birthday or something. The sentiment is from the Starburst Sayings stamp set and is stamped in Staz On Jet Black Ink on Very Vanilla and daubed around the edges with Calypso Coral ink. I cut it out with the matching Starburst Framelit Dies then coated the whole thing with Crystal Effects. You can't see from the card but it is mounted with Dimensionals to give the whole card some depth.

I'm happy!
Shanni

Monday, April 21, 2014

Epic Day - Not Too Shabby

I love square cards and I love shabby chic themed cards so today's card is a combination of these two things using the This & That Epic Day DSP because it is on sale until Tuesday night as part of the Weekly Deals at Stampin' Up!. Check out details on my Shopping Website.
The base card is Crumb Cake which goes perfectly with the grunged Pool Party page from the This & That Epic Day DSP. I mounted the DSP on a square piece of Pool Party cardstock which is daubed around the edges with Crumb Cake ink. I stamped on the Burlap Ribbon with the scroll stamp from Everything Eleanor in Basic Black Craft Ink which is on clearance on my Shopping Website.
I wanted to add some old world glamour and luxe to the card so from the bottom up, this is how I created the main feature. Baked Brown Sugar cardstock stamped with Hardwood in Whisper White Craft Ink, cut with the Chalk Talk Framelit Die. Tea Lace Paper Doily daubed with Crumb Cake Ink. Tucked in the side a piece of Crisp Cantaloupe Ruffle Stretch Trim and Victoria Crochet Lace Ribbon. The sun explosion stamp from Great Sport stamped on Very Vanilla in Staz On Jet Black Ink, fussy cut and daubed with Crumb Cake ink.
I stamped the crown from Shop Around Wheel in Baked Brown Sugar and punched out with the Artisan Label Punch (daubed edges), the 2c stamp from Postage Due and punched with the Postage Stamp Punch (daubed around the edges) and the fob watch in Staz On Black (face and hands stamped and punched separately with the 1 1/4" Circle Punch), the scroll from Happy Day stamped in Baked Brown Sugar - all cut out with the Apothecary Accents Framelit Dies.

The small flowers from Everything Eleanor were stamped in Bermuda Bay ink, fussy cut and daubed on the edges in Crumb Cake. The tiny flowers were punched from Calypso Coral cardstock using the Itty Bitty Flower Punch.

The rose was made using the Fancy Flower Punch. I stamped on Pool Party cardstock with a floral wheel in Soft Suede before I punched and daubed the edges with Crumb Cake. See my Tutorial from January 2013 for details on my Rose Making Tutorial. The glossy leaves are stamped from the Peaceful Petals stamp set on Simply Pressed Clay and fussy cut then coated with coloured Crystal Effects once they are dried (in this case I used Pool Party re-inker to colour the Crystal Effects).

Basic Pearl Jewels were the finishing touch for the flowers and other spots. I had used some Epic Day Washi Tape as well and the sentiment is from the Six Sides Sampler stamp set, stamped in Basic Black ink and punched out with the Modern Label Punch.

Not too shabby eh?
Shanni

Sunday, April 20, 2014

Epic Day - Amazing

This & That Epic Day DSP is on sale until Tuesday night (Australian time) as part of the Weekly Deals ~ check it out at my Stampin' Up! Website as there are some awesome bargains each week for another 2 weeks.

Given the great deal I thought it only right to share a project or two with you. Today's card:
Base card is Crumb Cake, I mounted a square piece of Calypso Coral on top of it and then used a square piece of the ledger book page from the This & That Epic Day DSP on top of this. I stamped the big splotches from Gorgeous Grunge in Calypso Coral ink. Next I used an additional piece of the chevron patterned page from the same DSP suite cut with the Apothecary Framelit Dies set and daubed the edges with Crumb Cake ink. You can just see the embossed Window Sheet acetate on the top right hand side using Beautifully Baroque TIEF.
Beneath the sentiment is a piece of Burlap Ribbon, on top of this I have used a piece of Natural Chevron Ribbon and a piece of gold Watercolour Wonder Designer Washi Tape. The sentiment is heat embossed in gold from the Chalk Talk stamp set on Very Vanilla and cut out with the matching Chalk Talk Framelits Die. I mounted the cut out on two pieces of Canvas Creations which I cut with the same shaped Chalk Talk Framelits die and daubed around the edges with Crumb Cake ink.
I cut the leaves with the Secret Garden Framelit Dies in Wild Wasabi cardstock, despite the fact that the matching green in the DSP is Gumball Green. I embossed the leaves with Beautifully Baroque TIEF and daubed them with Crumb Cake ink. I stamped the butterfly from Papillon Potpourri in Early Espresso and coloured it with Calypso Coral ink and Aqua Painter and then daubed the edges with Crumb Cake. Epic Day Washi Tape was the finishing touch.

Amazing!
Shanni

Saturday, April 19, 2014

Peaceful Petals Resist #3

Peaceful Petals from the Occasions Mini Catalogue is my favourite stamp set at the moment. I have had a class this week which is based around this stamp set and the many resist techniques that are available for use with a set like this.

Card number 3 is Baked Brown Sugar base with a Whisper White mounted piece as the blank canvas.
I have heat embossed the bunch of flowers from the Peaceful Petals stamp set in white embossing powder on the left hand side of the card. I then stamped over the flowers with En Francais using Baked Brown Sugar ink. The heat embossed stamps resisted this stamp image. Off to the right I used the mid sized sploshes from Gorgeous Grunge to balance the images; these are stamped in Baked Brown Sugar.

I then daubed the background starting from the left hand side in Crumb Cake ink and gradually on the right hand side in Soft Sky ink. Once again the heat embossed stamped images resisted the ink and the daubing of the ink toned down the script stamped area to make the background a little more subtle.
I used Burlap Ribbon to tie in with the colour scheme and base card. The sentiment is from the Too Kind stamp set this time stamped in Very Vanilla cardstock in Baked Brown Sugar. I have punched the sentiment out using the Label Bracket Punch which has carried over from the Holiday Mini Catalogue.

Finally I added the tiny Pearl Jewels to the centres of the flowers to add a bit of luxury and a middle sized one to the sentiment.

Hope that you have learned some new applications.
Shanni

Thursday, April 17, 2014

Vintage Take on Paper Craft Crew Challenge #89

The recent cyclone has meant that I have had opportunity to craft without feeling guilty about other things that could be done like the washing. . . but because I am now in the mode I have been quite productive in my output. . .

Last night was a late one. I noticed before I went to bed that the Paper Craft Crew had just posted their weekly challenge and I could not resist having a little play before I went to bed. This is PCCCCS#89:
And this is my interpretation:
Epic Day Designer Series Paper is on special as part of the Weekly Deals for Stampin' Up! until Tuesday 22 April so I thought it only right that I feature a project of two incorporating the paper which is one of my favourites from our Annual Catalogue.

Base card is crumb cake and I have used a variety of stamp sets - Shop Around Wheel, Postage Due, Everything Eleanor, Clockworks, Papillon Potpourri, Gorgeous Grunge and the Six Sided Sampler. . . yep nearly every stamp set on my table lol.
Where necessary I fussy cut and used Apothecary Framelit Dies and the Elegant Butterfly and Postage Stamp Punches. I cannot resist daubing the edges of everything with Crumb Cake ink to add to the aged and grunge look that is evoked by the paper design. For added texture I included Burlap Ribbon, Cherry Cobbler Seam Binding Ribbon, Basic Pearl Jewels, a Paper Doily and a crocheted flower that a friend did for me some time ago.
I also added a piece of card from the Artisan Embellishment Kit which is retired now although it was my all time favourite embellishments from Stampin' Up! I have stamped in Early Espresso, Cherry Cobbler, Soft Suede and Staz On Jet Black ink.
Hopefully you can see that there is some dimension in the card as well. I adhered most items with Tombow Glue and used Glue Dots for the Butterflies.

Check out the Weekly Deals at my Stampin' Up! Shopping Site.

Cheers
Shanni

Peaceful Petals Resist #2

Resist technique is a way of describing the resistance of ink on images or cardstock. Resist is the theme of this week's class and we are concentrating our creativity on the Peaceful Petals stamp set in the Occasions Mini Catalogue. The stamp set is really versatile although it comes with a thank you and thinking of you sentiment.

Card number 2 for the class is using crystal effects as a method of resisting ink.  This is the card made using Whisper White as the base with another piece set on top:
I have used two of the floral images and the leaves on a stem from the set in this instance. The largest flower is stamped in Perfect Plum (stamped off once on scratch paper first), the flower bunch is stamped with Raspberry Ripple ink (which is retiring soon) and the leaves are stamped in Old Olive. I then coloured each of the stamped images in with the colour that they were stamped with except the large flower which I coloured with Pink Pirouette because I wanted it to fade a little into the background.
Once the ink had dried I coated the flower bunch and the leaves with Crystal Effects. After the Crystal Effects had dried, I used a dauber and Soft Sky ink to smudge the background areas to add the faintest touch of blue.  The Crystal Effected areas resisted the ink.

The final steps were to punch an oval with the Extra Large Oval Punch, stamp the sentiment in Perfect Plum and then to add the small butterfly from the Papillon Potpourri stamp set (stamped in Raspberry Ripple and smudged with an Aqua Painter, punched with the Bitty Butterfly Punch and adhered with a Glue Dot).

Voila!
Shanni

Wednesday, April 16, 2014

Peaceful Petals Resist #1

I am loving the new set Peaceful Petals in the Occasions Mini Catalogue it is so versatile and the flower images are each unique and different. I have used it heaps and am using it this week for a series of classes. . .

The theme for the classes is "resist" as I want my customers to get value for money I like to teach them a heap of techniques with one stamp set so that they understand that they don't need to own every stamp set in the cattie in order to create beautiful cards. This is the first card that the class will be doing:
I have used the single flower image from the Peaceful Petals stamp set. I stamped it on a post-it and fussy cut it so that I could use it as a mask.  I stamped the flower in Staz On Jet Black on a piece of Whisper White cardstock, covered it with the post-it note mask and then using a Stampin' Sponge I rubbed Crushed Curry, Pumpkin Pie and Cajun Craze ink across the masked image.
Because the image is covered when you remove the mask the image is the original colour of the cardstock. Next I punched the image and coloured background out with the 2 1/2" Circle Punch and mounted it on a piece of Basic Black cardstock which I cut with the Windows Frames Collection Framelit Dies and mounted the piece with dimensionsals.

The sentiment is from the set as well, although this image would be good for any occasion.

See you soon!
Shanni x

Tuesday, April 15, 2014

Butterfly Tag in Sorbet Colours

Some of you may have read recently that I don't really like pink or blue to work with and really have to push myself to use them. . . well I have been challenging myself to move out of my comfort zone and here is a recent creation:
This was just a prototype for future project. I cut a rectangle of Whisper White cardstock then made the shape at the top using the Window Frames Framelit Dies and the little punch hole from Chalk Talk Framelit Dies set. The ribbon is the Coastal Cabana and Strawberry Slush Ruffle Stretch Trim to tie in with the colour scheme.
For something a little different I stamped the small splashes from Gorgeous Grunge and the fob watch and cogs from Clockworks in Smoky Slate. I then stamped En Francais in Versamark ink and heat embossed in white.  I then stamped the four different butterflies from the Papillon Potpourri and Best of Butterflies in Staz On Jet Black ink. The little bit of script at the bottom is from Notable Notions in Staz On ink.
The background is sponged Strawberry Slush, Crisp Cantaloupe and Coastal Cabana ink. I love the emboss resist technique and it always gives such dramatic results. The greatest challenge with this technique was not mixing the colours too much.
I added a quarter of a doily to the bottom corner for some texture and interest.

A very simply and very colourful project. . . and I am almost happy with the results.
Shanni

Sunday, April 13, 2014

Retiring DSP & Freshly Made Sketches #131

As the Annual Catalogue nears its year close I like to go through my designer series paper collection and use the ones that I will probably not use again. . . I never demo retired items because as luck has it everyone falls in love with the things they can no longer have lol.

So my need to clean out the designer series papers and Freshly Made Sketches happened to coincide this weekend. This is Freshly Made Sketches #131:
Here is my take on the sketch:
Gingham Garden DSP on page 153 of the Annual Catalogue is bright, bold and bordering on difficult to use if you are someone who likes the neutral palette ~ me! Because of the dominant colours and pattern in this DSP I have found it difficult to use; it sometimes outshines the stamped image it is placed with. But do not fret. . . this is when I break out the kid sets and make birthday cards for my little darlings' friends.

I used the Melon Mambo gingham page of the Gingham Garden DSP on a Whisper White cardstock base. I have framed the whole project on a piece of Melon Mambo cardstock because I needed a border to contain the gingham design and felt that the Whisper White was not enough. The horizontal piece of Melon Mambo has been stamped with the trio of flowers from Betsy's Blossoms in VersaMark ink so that it is subtle ~ it looks a bit like a shimmery watermark. This is mounted on a piece of Whisper White so that it doesn't blend in with the background.
I stamped the ballerina from Stylin' Girl in Jet Black Staz On Ink on Whisper White and stamped the dress area again on a floral page from the Gingham Garden DSP suite. I fussy cut the dress and stuck it on the stamped image to create the illusion that dress has been coloured/stamped in in a different pattern. I used this particular patterned DSP page because it complimented the gingham pattern in the background and provided some balance of colour.

Finally I stuck three Rhinestone Jewels on the ballerina's crown and stamped the sentiment from Express Yourself which is an exclusive hostess set. Clean and relatively simple.

Kids love bright colours and I have managed to use a little more DSP before the cattie year ends.

Stylin'
Shanni

Saturday, April 12, 2014

Clockworks & Paper Craft Crew #88

I am so excited I was a Featured Artisan on the Paper Craft Crew blog for Challenge #86 and I feel so motivated to share another of my creations as a consequence. Thanks so much folks!

So the PCCCS#88 Challenge for this week is:
And here is my take on it:
I love the Soho Subway DSP and am always looking for projects to use it on. My base card in this instance is Early Espresso and I have mounted Very Vanilla on the top to form my blank canvas and also inside the card. I stamped this with the small splashes from Gorgeous Grunge in Smoky Slate and daubed the edges in Smoky Slate.

The colours in the DSP are unique and look kind of rusty and oxidised so I wanted to keep to those tones. I mounted the whole card on a square piece of Not Quite Navy to tie in with the gun metal grey and chose to make the "tag" element out of Smoky Slate cardstock. I stamped Off the Grid on  the Smoky Slate in the same coloured ink and cut it out using the bread tag shape from Chalk Talk Framelit Dies. I used Baked Brown Sugar to daub the perimeter so that it would look rusty.

I know that my two strips of DSP at the back are a bit wider than intended by the PCCCS but I wanted to show off the wooden lettered page of the Soho Subway DSP to it's full extent - its so divine!
I stamped the additional tag outline that contains the sentiment from the Notable Notions set in Early Espresso on Very Vanilla; I fussy cut the shape out as I did not want any light outline around the edges. The sentiment is from Perfect Pennants stamped in Baked Brown Sugar. The little metallic brad completes this aspect.

Given that the sketch has a brad right at the top of the tag I was a little stumped as the whole card would be a bit too busy with another embellishment, so I decided to add some texture in place of the brad. The frayed Burlap Ribbon and Linen Thread around the top right hand corner is in place of this element. I wanted something to balance the other corner and thought that this was just enough.

The three embellishment aspects in the top left hand corner are a a dark wooden button from the Natural Designer Buttons with a Linen Thread tie off. The Baked Brown Sugar embellishment from the Inn Colour Boutique Details pack and a stamped button from the Notable Notions stamp set stamped in Smoky Slate, punched with the 1/2" Circle Punch and daubed around the edges.
For something different - the embellishments on the right hand corner of the tag are all from the Clockworks stamp set! I love this set and use it a lot.

I stamped the fob watch in Early Espresso on Very Vanilla and then I stamped a separate face with hands on the same cardstock in Baked Brown Sugar and punched it out with the 1 1/4" Circle Punch and daubed the edges with the same coloured ink. Of course I had to fussy cut it out.  The brad in the centre is from Vintage Trinkets. I then used Crystal Effects to add some gloss and it blurred the stamped image a bit making it look older. It also brought out the green tone in the Early Espresso ink which I was a little worried about to begin with but became accustomed to.

The cogs from the Clockworks set were stamped in Baked Brown Sugar on Very Vanilla. I fussy cut the larger of the cogs and punched the smaller one out with the 1/2" Circle Punch and daubed the edges of both with Baked Brown Sugar and a bit of Smoky Slate ink.
Finally the three metallic brads along the bottom tie in with the two elements required on the sketch. I am a stickler for odd numbers so apologise for this addition. The sentiment is stamped in Early Espresso on Very Vanilla and the stamp is actually from Cycle Celebration and normally says Wheely Sweet Friend. I punched it with the Word Window Punch and daubed the edge with Baked Brown Sugar. It's mounted with dimensionals. I also wanted to make the sentiment pop a little more than the tag so used the solid gold washi tape from the Watercolour Wonder Designer Washi tape in the Occasions Catalogue. I also used it on the top left hand corner of the card to balance the whole layout.

Thanks for the inspiration Paper Craft Crew!
Shanni xx

Friday, April 11, 2014

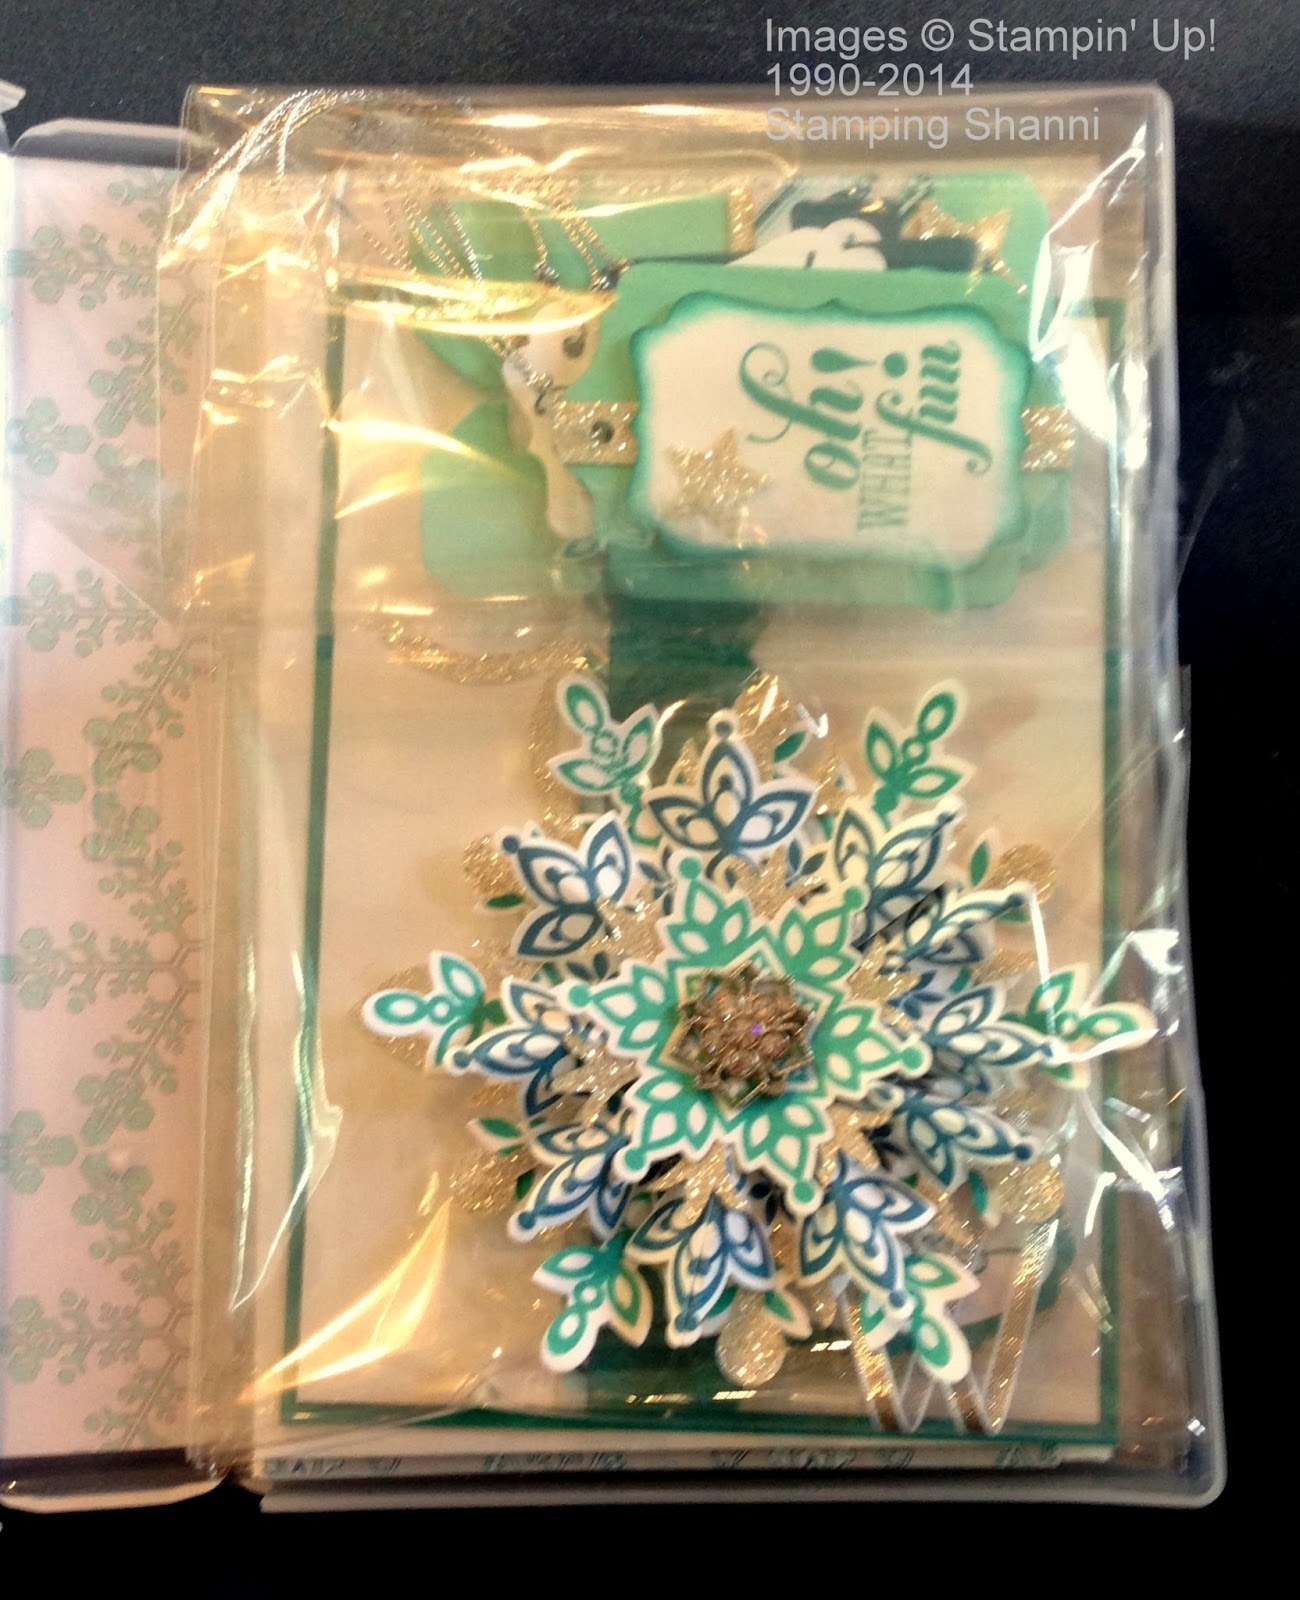
Joyful Tidings Wood Mount Clear Case

Another Wood Mount Clear Case which I decorated in December ~ I wanted to share the idea so that you could plan ahead for next year's purchases lol!
Following the same approach as last time I decorated the Wood Mount Clear Case I inserted the DSP behind the plastic sleeve on the cover of the case. This time the DSP is Winter Frost Specialty DSP from the Holiday Cattie (now retired); although some items have carried over and are still available.

On the front of the cover I made a snow flake ornament following the numerous tutorials on You Tube.  The colours I have used to stamp the snow flakes from the Festive Flurry set are Bermuda Bay and Island Indigo (those names are ironic given that I have made a snow flake). Of course I cut the snowflakes out using the Festive Flurry Framelit Dies which are a perfect match for the stamp set - gotta love that! The Silver Glimmer Paper is the perfect accompaniment.  The Frosted Finishes Embellishments were by far my favourite product in the mini cattie.

Behind the snow flake I cut a number of pennants to dress and decorate the front of the case including extra Silver Glimmer Paper, the foil page from the Winter Frost Specialty DSP and matching cardstock with the addition of some Coastal Cabana (irony is still playng a part).  The sentiment comes from the Christmas Messages set - I have rocked and rolled the stamp in Bermuda Bay and Island Indigo inks and duabed the outside of the punched out shape with Bermuda Bay ink. the label framelit from Chalk Talk Framelit Die set was a perfect match.

I have punched and cut the Silver Glimmer Paper with the retired Snow Flake Punch and the last years Bigz Die.

Inside I included ten (10) cards made with matching cardstock and themes, a Snowflake ornament for the tree and five (5) present tags in complementary shapes and colours. Here is a shot of the inside although the cellophane bags don't show it all off to the best advantage.
Although Christmas has gone for another year I wanted to share the concept of decorating the Wood Mount Cases for different events.

Get creating!
Shanni xx