Tuesday, July 31, 2012

Learning to Colour. . .

So folks I am learning to colour.  As you know I love the Stampin' Write Markers that we have at Stampin' Up!, I love that they colours are all available in both ink pads and pens and that the blender pens and aqua painters are such versatile pens. . . But everywhere I look these days in blogland people are copic this and copic that so I think that the dark side beckons. . .

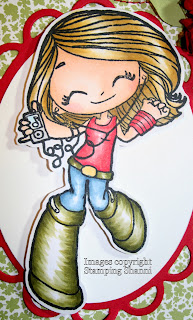
Her is my first official attempt at colouring in, I have used a lovely image from Some Odd Girl:
I laid the card out with two types of embellishments one a Brights Buttons tied off with Lucky Limeade Bakers Twine over the greeting which I just love and:
the other with hand made roses in Real Red cardstock and leaves Pear Pizzazz and Garden Green cardstock.  I had trouble with the glue gun and have blisters from twisting the baby roses!

The base card is Real Red, the mount card Whisper White, the paper Twitterpated DSP and I have stitched around the edges with red cotton to tie in the theme.
So here is a close up of my colouring. . .

You can see the glue in the heart of the roses if you look closely enough. . . not too professional. . .but the tips of my fingers were so burnt in the end that I couldn't even battle the fine work of removing the excess glue. . . a job for tomorrow.

Until next time
Shanni xx

Monday, July 30, 2012

Marquee Background

One of the things that the awesome Pam Morgan showed us in Canberra in June was how to make marquee backgrounds ~ now this may have a different name but it is the best way that I know to describe the colourful background that you see on this card:
I have had a few people ask me about the card background so here is how I do it:
Start with three pieces of coloured cardstock - this means that you can actually make three different card backgrounds as you use the pieces that you don't use with the original to make two others (but a different order of colour combinations).
On the lightest piece of cardstock -draw a starting point. Make it big enough to see easily (you will be covering it over anyway with your card's main feature/stamped image so don't worry if it is a bit messy), I use pencil because it can be rubbed out later.  Rule lines through the central point, I like to have about 12 pieces at the end of the day. So I obviously draw six lines through the central point.
I then use the guillotine to cut along each line and either construct the base card as I go or number them sequentially close to the centre point so that I don't lose track of the order in which the different colours are to be stuck down.  I cut all three coloured card stock pieces at the same time.

I start by cutting the card at a half way mark (need not be perfectly in halves) ~ I am referring to the pieces here!
I cut each subsection of the pattern separately (in my mind I divide the segmented areas into four) and stick them down as I go. So above the cut pieces are piece #1 (on the top left hand side), the middle piece is actually piece #2 and #3 it just hasn't been cut yet and the one on the bottom right hand side is #4, #5 and #6 prior to cutting. . .

So here is #1, #2 and #3 ready to go.
I stick them down with snail adhesive and place each piece where it was in the original base card.  And you continue to add the pieces. . .
So you get the idea.  Make three base cards at the same time so that you are not left with odd shaped scraps and have three backgounds ready to go. You can adjust triangle sizes and the number of triangles in your background ~ you are only limited by your patience and your imagination.  My thought is that they make great kids card bases. 

Here is another that I made using a soon to be released stamp set ~ Animal Talk.  Terrific when combined with the sound recording devices which will also be released in the new cattie.

Chat later
Shanni x

Tuesday, July 17, 2012

Simply Soft Set

I have been wanting to play with the Simply Soft Hostess Stamp Set for some time now and in typical fashion when I finally get around to using it on a variety of cards it is one month from being retired. . .

I stamped out the image of the four flowers on Whisper White card stock and coloured the images using an Aqua Painter and various ink pads.  Once I had completed them all I simply cut them up and made a set of eight cards with them.  The one constant is the stamped image, everything else varies from card to card.
This one is coloured using Cherry Cobbler and Always Artichoke but I have mounted the stamped image on Sahara Sand card stock with Cherry Cobbler highlights.
This one is coloured using Perfect Plum and Wisteria Wonder inks.  I mounted it on Wisteria Wonder card stock and treated the white card stock to some embossing to make the image and layout pop - Designer Frames around the image and Petals a Plenty behind the image.
Coloured with Tempting Turquoise and Always Artichoke with a touch of Marina Mist.  The image is mounted on Marina Mist cardstock.  The background card was debossed using the Adorning Accents textured Embossing Folders.
The black and red combination is really dramatic - coloured in Riding Hood Red, the colours really pop with the black hessian in the background and the Labels Collection Framelit Die mounting.
I have combined the Twitterpated Designer Fabric with Pear Pizzazz card stock on this card. The image is coloured with Blushing Bride ink.  The flowers from Vintage Vogue stamped with Blushing Bride (and cut out) and the centres punched out Riding Hood Red for contrast.  The leaves from French Foliage are stamped with Pear Pizzazz.
Coloured with Daffodil Delight and Peach Parfait highlights in the centres of the flowers I used Pear Pizzazz on the leaves.  The image really pops because I shaded the card stock behind the stamped image with Pear Pizzazz ink on the same coloured card stock.  A strip of contrasting Twitterpated Designer Series Paper balances the whole layout.
This image is also coloured in Riding Hood Red.  It is mounted on Chocolate Chip card stock which has been stamped with En Francais using White Craft ink then mounted on Riding Hood Red card.

Final card coloured using Calypso Coral.  I actually shaded over the whole image using the same ink colour and a dauber to give a different finish.  The striped paper is Twitterpated DSP.  I think that the colouring makes the image look quite dramatic.

I will probably give the whole set of eight as a gift and really enjoyed the colouring. . . I am just a big kid at heart who loves to colour in!

Shanni x

Monday, July 16, 2012

Cairns Show Entries. . .

I did another The Open Sea card for the Cairns Show which was similar to the one that I did for the Atherton Show (a few different layers, embellishments and colours) but I will upload photos of it in a few days.

Today I am going to share another of my entries, which was a bit different from what I usually do. Check it out:
The base card for this is Very Vanilla which is an unusual selection you may think but I needed to use the First Edition Speciality Paper which has vanilla as its colour base. I also used the Red Glimmer Paper because the card needed something to give it a bling factor.  The letters making up the words are rub-ons and the pencil is also a rub-on (which I shortened to fit the page because the mounting card at the front is on 14cm x 14 cm!

I was inspired to make the apple after seeing some of Lydia Fiedler's creations. It is made using the Heart Punch.  Simply punch out about 25-30 punch shapes, fold them in half and stick them together.  I daubed the colour on every part of the shape using Cherry Cobbler and Lucky Limeade ink and a dauber.  On some pages I inked into the page on others I simply left it on the outside edge.

The stalk and leaf is made using the Bird Builder Punch. The stalk is the branch part of the punch punched out in Early Espresso and the leaf is the bird wing from the punch done in the First Edition Specialty Paper and daubed in Lucky Limeade. 

A little bit different
Shanni x

Sunday, July 15, 2012

Creating for the Cairns Show

A number of us entered paper crafting items in the Cairns Show, we are hopeful of inspiring the organisers to arrange better sponsorship, sections and prizes. . .

This is one of my entries
For want of a better description - this is an acetate card.  It is made with a 12 x 12 Window Sheet which I cut in half to make a square 6" x 6" card.  I stuck Whisper White card on the back sheet so that there is somewhere to write.

The front is made using pieces of Twitterpated DSP which I cut into 1.5 cm strips (6" long) and stuck straight to the acetate using sticky strip.  The stamped image is from Apothecary Art, coloured with Blushing Bride, Pear Pizzazz and Riding Hood Red Stampin' Write Markers.  The word "happiness" is from the Loving Thoughts stamp set.  I have framed it up using Blushing Bride, Pear Pizzazz and Riding Hood Red card stock which I have cut out using the Labels Collection Framelit Dies and for texture have run them through the Big Shot using the Square Lattice Textured Embossing Folder.

As you know I love texture in my cards and this is something that I accomplish through layering.  I have layered this time using flowers.  I stamped flowers with Blushing Bride and Riding Hood Red ink on Whisper White card stock using the Vintage Vogue stamp set and cut these out.  I also stamped the leaves in Pear Pizzazz ink on Whisper White card stock using the French Foliage stamp set which I then cut out.  I added pearls to the flowers for a bit of glamour.

The Whisper White Organza Ribbon is threaded around the entire card and through the stamped image on the front and tied in a bow to add more texture and a luxurious feel to the card.

Hope you like it!
Shanni xx

Thursday, July 12, 2012

Twitterpated Projects for the Ingham Show

So I did two or three other projects for the Ingham Show to display on Michelle's stall but I will only post about one more.  I made an easel card and matching box.  I was inspired by my stamping sister Teresa Brown to make boxes after she gave me one at the Stampin' Up! Convention in Canberra in June.

This is the card that I came up with for the show:
The base is Blushing Bride and then I mounted some Twitterpated DSP on Riding Hood Red cardstock, stitching around the edges.  The rosette is made with more Blusing Bride patterned Twitterpated DSP - I punched the edges first with the Scallop Trim Border.  I scored the paper with the Simply Scored tool and folded it easily into the rosetee.  The image on top is from the Apothecary Art stamp set, coloured with Stampin' Write Markers in Pear Pizzazz and Riding Hood Red. 

The stamped image was cut out with the Labels Collection Framelit Die and I added an additional one to the back which I cut out in the same size in Riding Hood Red to tie in the colours on the card and the coloured image.  Crystal Effects made the flowers pop a bit more.

The little flowers on alternate corners were made using the Floral Fusion Sizzlet Die.  I distressed each cut out and pulled the cardstock apart to make the paper tissue thin.  I then stuck the different colours together randomly and added a pearl to the centre.  The final touch of pearls on the alternate corners was to balance the project.
I decorated the inside of the card using the same little flowers with pearl centres and a partial stamped image from the filigree frame from the Creative Elements stamp set in Riding Hood Red.  I also stitched the inside of the card to tie in with the theme of the front.

The matching box is made from Blushing Bride cardstock.  I scored the box lid using the Simply Scored Tool, then folded the sides.  I then ran the lid through the Big Shot with the Labels Collection Framelits Die before I stuck it together to create the window.  I cut two extra borders using the Labels Collection in the Blushing Bride and Riding Hood Red. I stamped the filigree image from the Creative Elements stamp set in Riding Hood Red and Staz On Jet Black.   I coloured a few of the flowers on the stamped images in Blushing Bride Stampin' Write Marker.
 
I inserted a piece of acetate behind the front of the lid and then stuck the extra Labels Collection borders on the inside and externally on the acetate. I also added the flowers that I had created with the Floral Fusion Sizzlet Die in Blushing Bride and Riding Hood Red cardstocks in the same way as I had for the card and added pearl centres to tie in with the theme.
I added some Pleated Satin Ribbon in Riding Hood Red around the sides of the box and daubed with Riding Hood Red Ink.

This is not a card that I would attempt to post as it would be too fragile but it is definitely one that I would "give" to a friend.

Enjoy!
Shanni x


Wednesday, July 11, 2012

Ingham Show

Two of my besties held an exhibit at the Ingham Show which is about three hours south of Cairns last weekend.  They worked tirelessly to put a display together and I thought it only right that I make a few things to exhibit at the event to help them out.

Michelle wanted the theme to be in the colours and patters of the Twitterpated DSP so here are a few of my contributions:
I actually cased this card from a good friend and demonstrator Teresa Brown - she had made it especially for me for the Stampin' Up! Convention in Canberra but a friend of mine had been desperate for a wedding card and went through my supplies and fell in love with the card. . . long story short I re-made it (slightly differently) from memory! Cardstocks are Naturals Ivory, Basic Gray and Riding Hood Red. I used the Floral Fusion Sizzlet Die for the flowers and the Lace Ribbon Border Punch for the fancy embellies.  Heaps of pearls and the swirls and drops from the Swirls Scribbles Sizzlet Die.

The Twitterpated DSP colours and patterns suited Paula down to the ground for the display because that girl can't get enough of blue. . .
So this little circular cheese box was covered with Twitterpated DSP and I added a few Marina Mist swirls cut out with the Big Shot and the Swirl Scribbles Sizzlet Die.  Flowers made with Blossom Party Orginal Die (large flower cut out) in Riding Hood Red cardstock and Little Leaves Sizzlet Die in Pear Pizzazz cardstock.
Twitterpated DSP is one of those brilliant packs of paper which include masculine and feminine colours and designs.  I couldn't resist pairing this striped design with nice clean Whisper White butterflies that I created with the Big Shot and the Beautiful Butterflies Bigz Die which I then ran through the Stripes Textured Embossing Folder and the Square Lattice Textured Embossing Folder.  The button is from the Subtles Designer Buttons Series and the Baker's Twine is in Island Indigo.  I sprayed the whole thing with Frost White Shimmer Paint diluted with rubbing alcohol.
Here is a little more Twitterpated DSP coupled with a Marina Mist base card and Riding Hood Red embossed with the Petals-a-Plenty Textured Embossing Folder.  The Button is from the Subtles Designer Button set the Baker's Twine is in Cherry Cobbler and the birthday greeting is from the Hostess stamp set - Happiest Birthday Wishes.  I wanted to break up the design a little more so added the Riding Hood Red Pleated Satin Ribbon, Marina Mist Satin Ribbon, Marina Mist lettering (glossed with Crystal Effects), a Whisper White daisy cut with the Blossom Party Original Die and a Marina Mist Glimmer Brad from the Subtles Collection.  Love that it all goes together so easily!
Final little card for this post Blusing Bride cardstock embossed with the Polka Dots Textured Embossing Folder on Whisper White cardbase.  The rosette was made with some paper from the Beau Chateau DSP range and the contrasting pieces behing it are all Twitterpated DSP.  The flower on the top of the rosette was punched with the Blossom Punch and the Scallop Circle Punch finished off the centre (I bent all the edges up to give it further dimension).  The button is from the Regals Designer Buttons selectiona and the Baker's Twine is Island Indigo.

Enjoy!
Shanni xx

Tuesday, July 10, 2012

Another Atherton Show Entry. . .

Whilst I was sick one of my friends decided that a group of us needed to place entries in the Atherton Show which is a rural show in our region - the prizes are great for this event and Jess thought that we should all try to get a piece of the action.  She filled in entry forms for a group of us then told us we all needed to have the entries to her within a specified time so that she could drop them to Atherton (an hour and a half away).  Truth be told she didn't give us much choice in the matter lol!

I was on my sickbed and this ranked pretty low on my priority list but I thought that I could not let my friend down as she is always doing thoughtful things for me.

Here is another of the cards I came up with on Friday to be entered.

This card is also a nice square 6" x 6" - the base is Blushing Bride and I mounted the Twitterpated DSP on Riding Hood Red. I stictched around the board to tie in the colours and shabby chic theme.  I love making the rosettes to mount the Apothecary Art stamped images on as it really picks up the colours in both images (the DSP and the coloured stamped image).

I coloured the stamped image from Apothecary Art using the Stampin' Write Markers in Blushing Bride, Pear Pizzazz and Riding Hood Red.  I then used the Labels Collection Framelit Dies and Square Lattice Embossing Folders for the framing of the stamped image. The little bits of ribbon are an added touch luxury - Pleated Satin Riding Hood Ribbon and Blushing Bride Grosgrain.

The card is actually an easel card.
I added the crocheted fleurettes in Pink, White and Riding Hood Red because they matched the colours of the papers and inks so perfectly and tied in well with the sewing.  Of course I couldn't resist adding pearls and a bit of bling in the form of Frost White Shimmer Paint dilluted with rubbing alcohol to make the whole card extra appealing.

The stitching on the inside of the card ties the whole thing together even further.  I hope that the judges liked the finished project - it was quite easy to pull it together so I think it is one of those things that was simply meant to be. . .

Shanni xx


Monday, July 9, 2012

Atherton Show Entry

It has been a busy two weeks but not necessarily in a good way, got flu which evolved into pleurisy and pneumonia so have had a break to recover. . . almost back to normal now (*laugh* I have never been normal!).

Here is one of my creations that I entered in the Atherton Show on Friday - I was hardpressed to be creative and left my run until the very last moment.
I thought that there would be lots of pretty entries featuring flowers and lovely feminine images so decided to go with something a little different.

This card is 6" x 6" and is made using Early Espresso, Not Quite Navy, Crumb Cake and Very Vanilla cardstock.  The Designer Series Papers are both retired ones. . . Nautical Expedition and Newsprint.  I have daubed and distressed the card and papers and layered them as much as I could - the daubing ink is Early Espresso.

I think that masculine cards need texture, weight and distressing in order to have a "manly" impact.  I hope that this has captured the feel properly.

Shanni